
Cross Docking is a logistics approach that reduces storage time by transferring inbound shipments directly from the receiving area to the shipping area with little or no stocking. Rather than completely storing the products in the warehouse, they are sorted quickly and shipped out to fulfill end-user orders.
In Odoo, Control Cross Docking is accomplished through Routes and Warehouse Operations. If applied correctly, Odoo automatically moves inventory through Vendor > Input Location > Output Location > Customer without being put into storage for an extended time. This method can help businesses:
- Reduce inventory holding costs
- Increase delivery speed and accuracy
- Increase efficiency of warehouse operations
By enabling multi-step routes and giving the Cross-Dock route for some products in Odoo, the flow of inventory from supplier to customer happens effortlessly and automatically — an excellent approach for companies that operate on a just-in-time or fast-moving inventory.
Steps for Configure Cross Dock
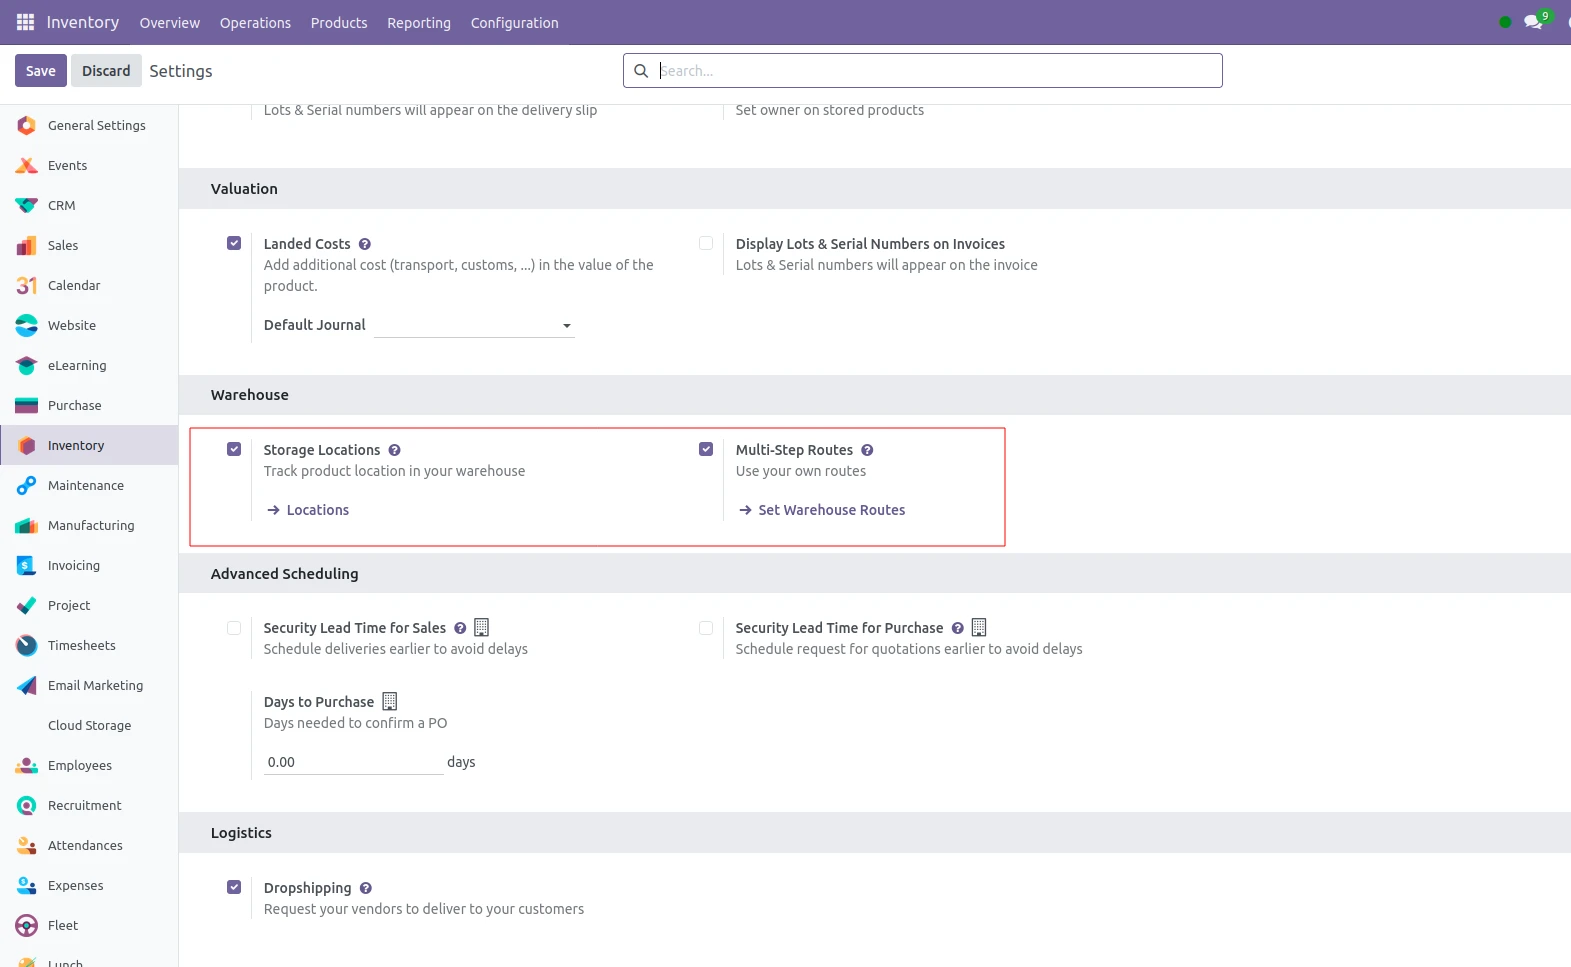
1. Activate the Multi-Step Routes
- Inventory → Configuration → Settings.
- Under the “Warehouse”/“Operations” section, enable Multi-Step Routes (sometimes labelled “Routes & multi-step receipts/deliveries”).
- Save. This often also enables “Storage Locations” (because cross-dock requires internal locations).
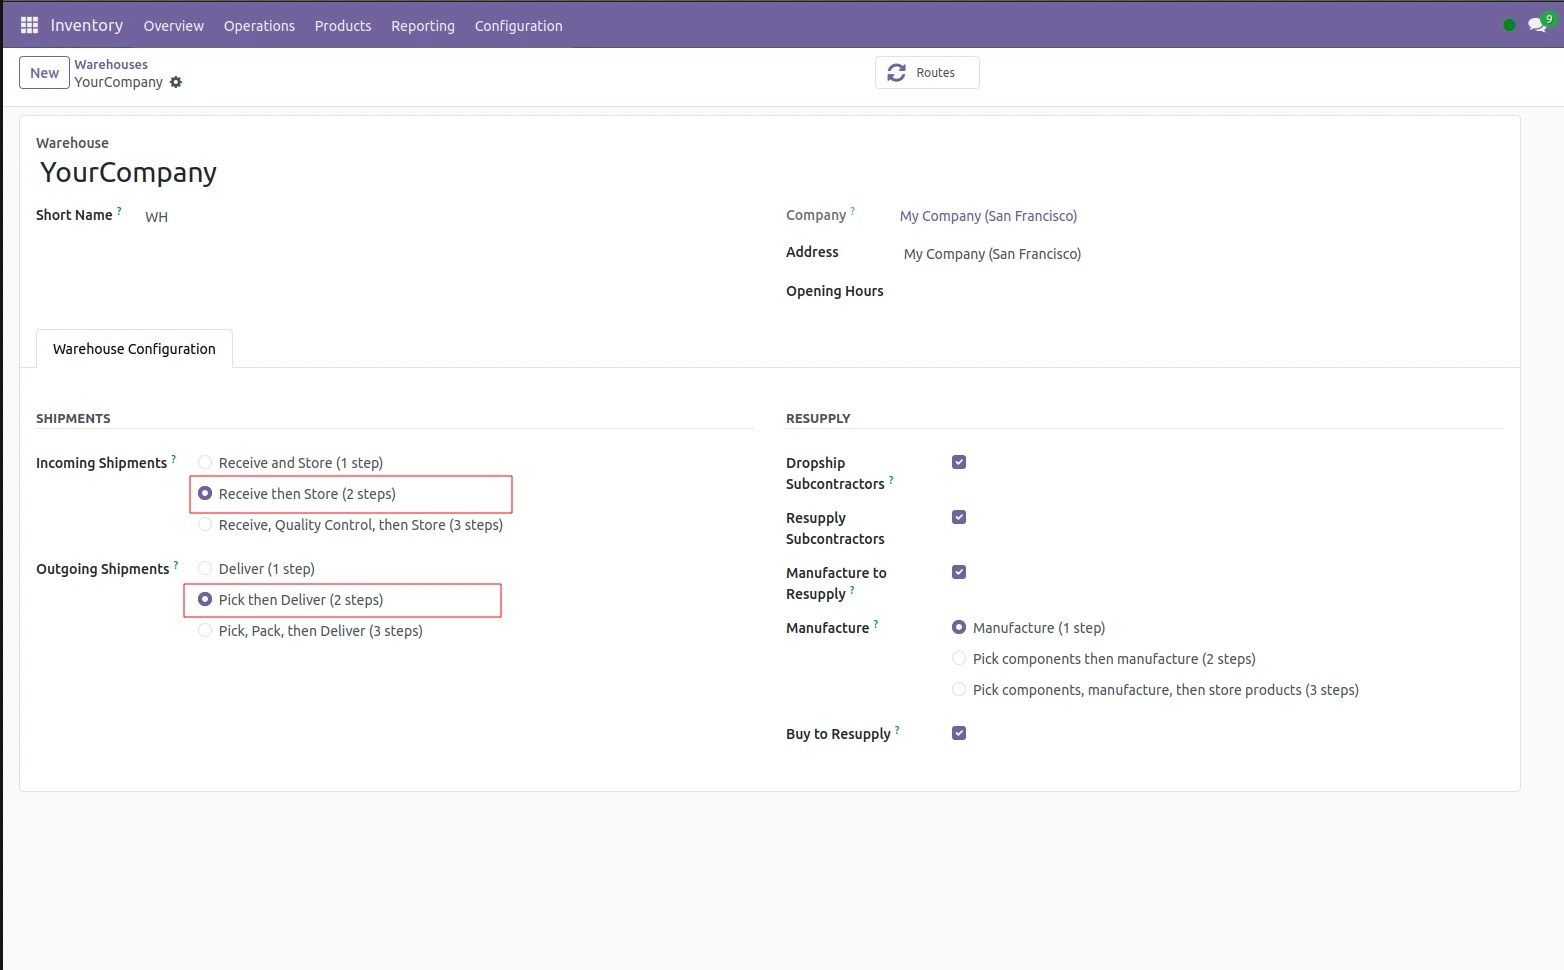
2. Configure the Warehouse Locations
- Inventory → Configuration → Warehouses.
- Edit your warehouse.
- In the “Shipping & Receiving” (or similar) area, set Incoming Shipments and Outgoing Shipments to “2 steps” (i.e., input → stock & stock → output) or configure accordingly. This is necessary so that you have internal “Input” & “Output” locations in the warehouse.
- Save the warehouse.
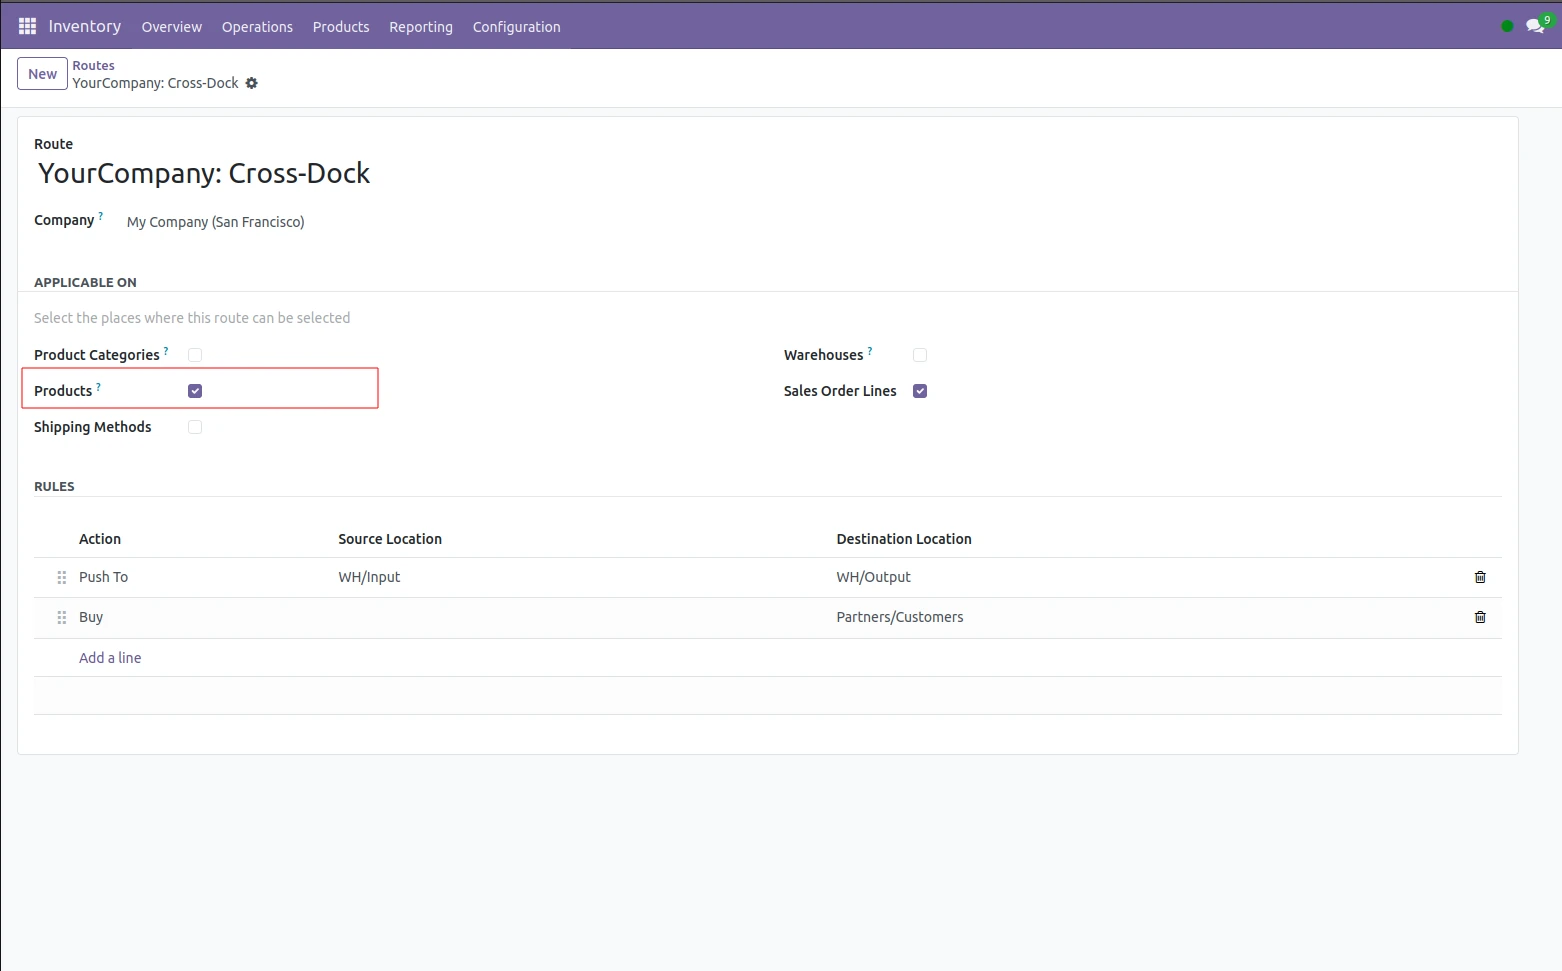
3. Review / Create the Cross-Dock Route
- Go to Inventory → Configuration → Routes.
- Look for a route named Cross-Dock (or “YourWarehouse: Cross-Dock”) which typically appears once you enabled the preceding steps.
- If not present (depending on version, e.g., Odoo 18.2 onward, you might need to create it manually) you can “New” route:
- Give it a name (“Cross-Dock Route”)
- Add rule lines such as:
- Action: Push to and Operation Type: Internal Transfer (Input → Output). Source location: Warehouse/Input; Destination location: Warehouse/Output.
- Action: Buy or Receipt → Operation Type: Receipt (Vendor to Input).
- Action: Delivery → Operation Type: Delivery (Output → Customer).
This sequence creates the inbound to internal, then outbound step.
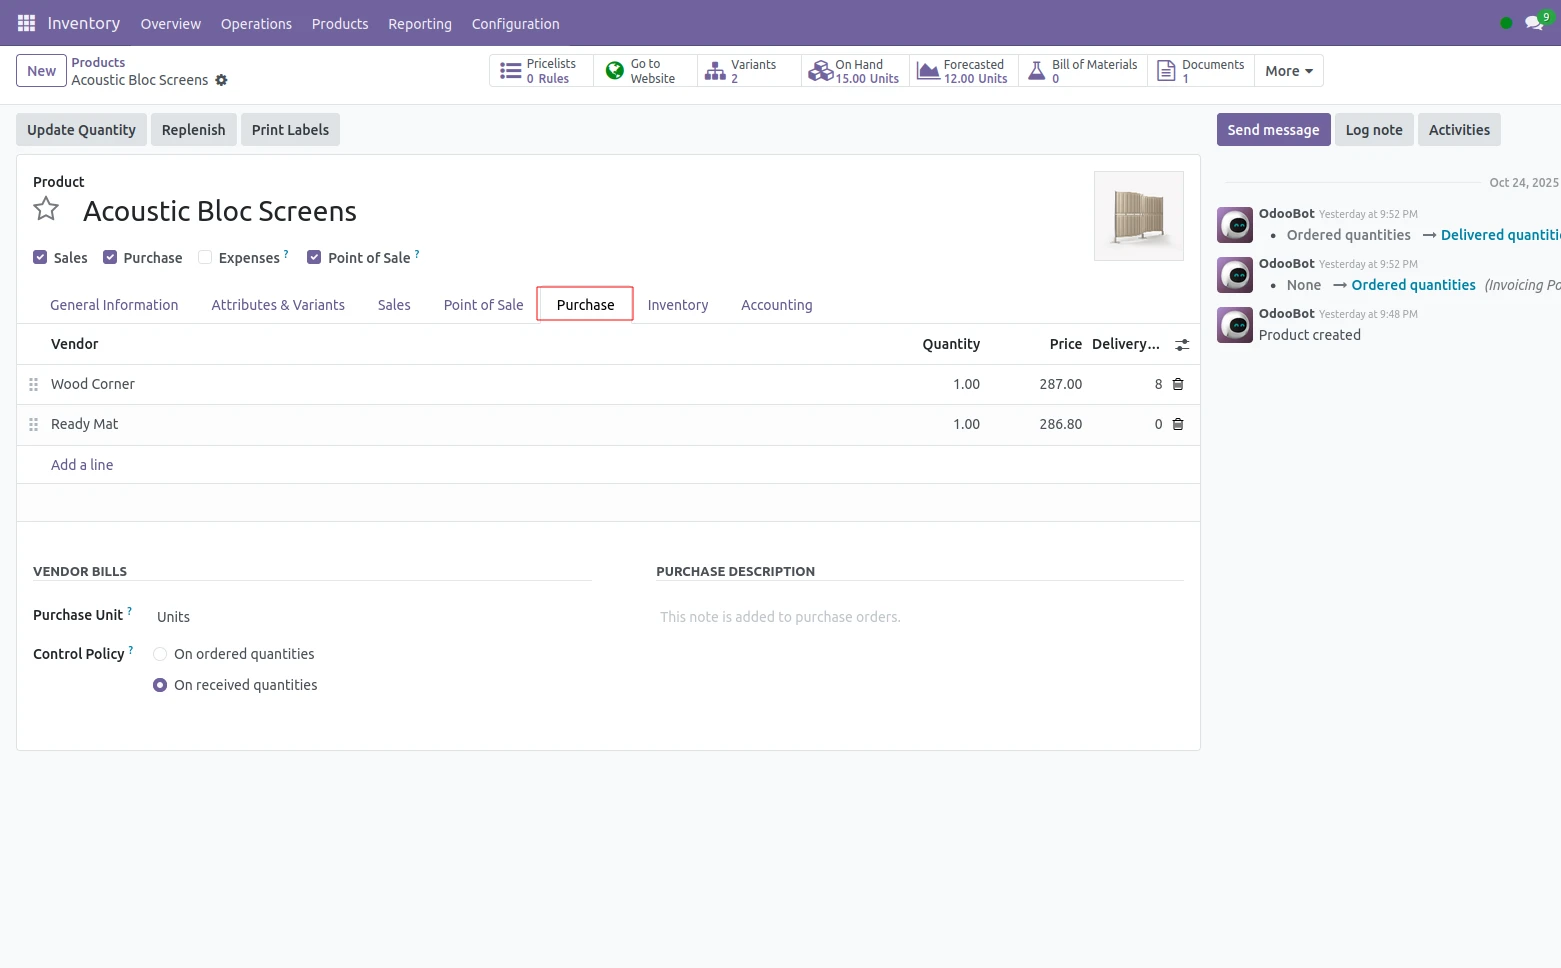
4. Configure the Route for Products
- Inventory → Products → Products, open a product you want to cross-dock.
- Under Inventory tab: in the “Routes” field, select both Buy and Cross-Dock. The “Buy” route ensures a purchase order is triggered; “Cross-Dock” ensures the internal routing is used.
- Under Purchase tab: ensure you specify the vendor(s) and vendor price for that product.\
- Save this product.
Workflow example:
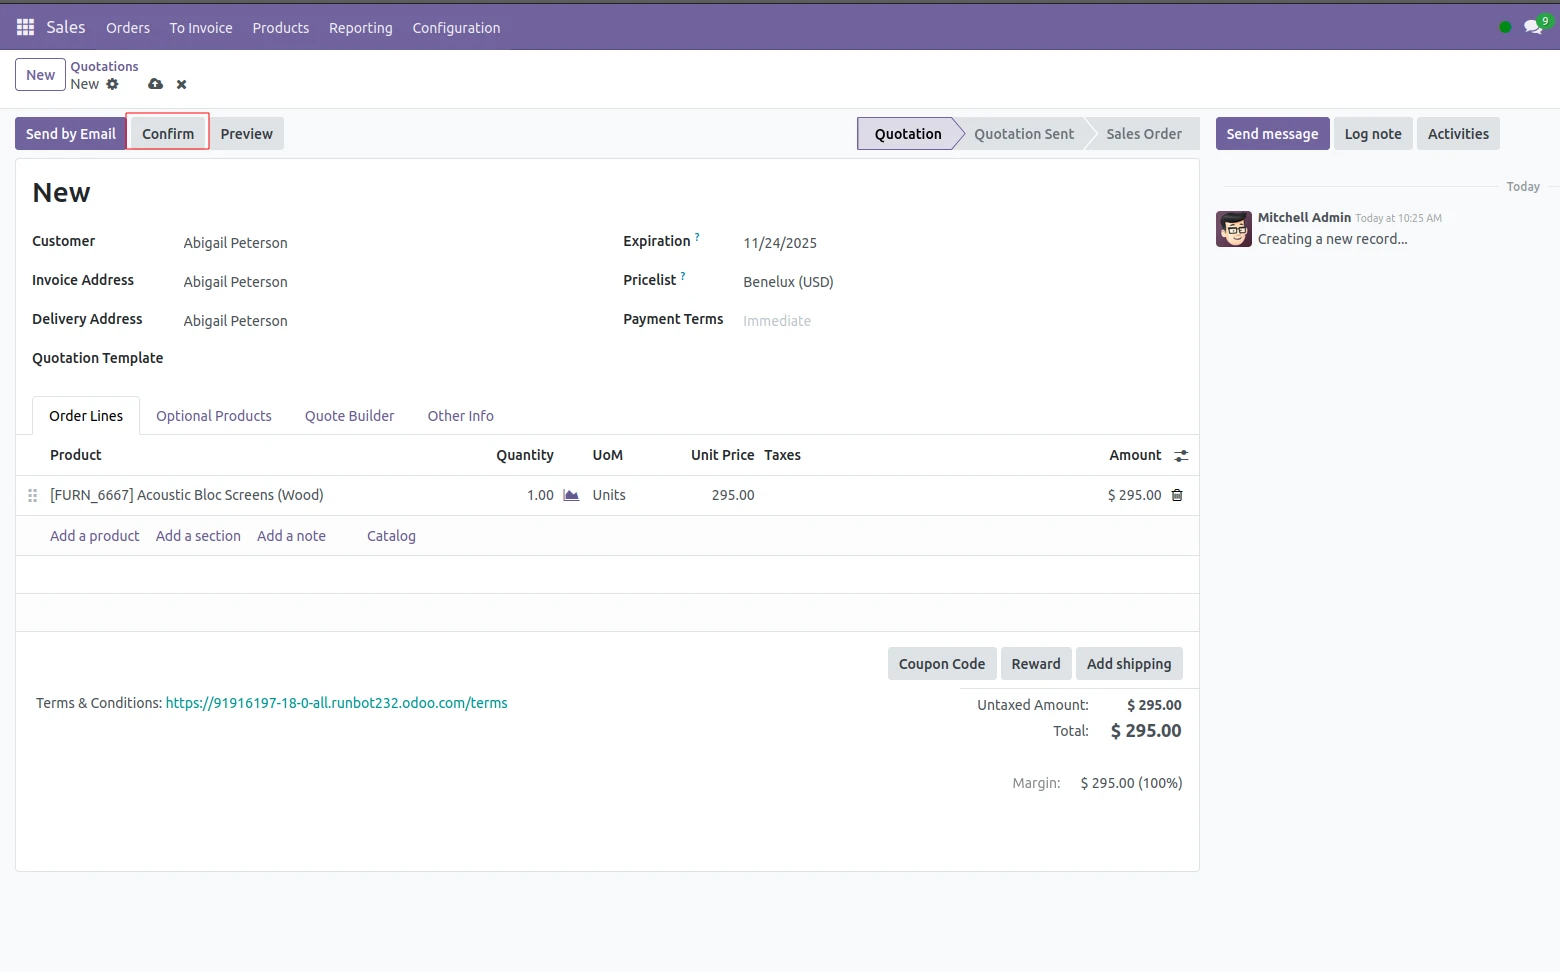
1. Create a sales order for the product you set up with the Cross-Dock route and confirm the order. As described by your configurations, Odoo will:
- Create a purchase order (due to the Buy route).
- Create 2 internal transfers from Input → Output (cross-dock area) and Output → Customer.
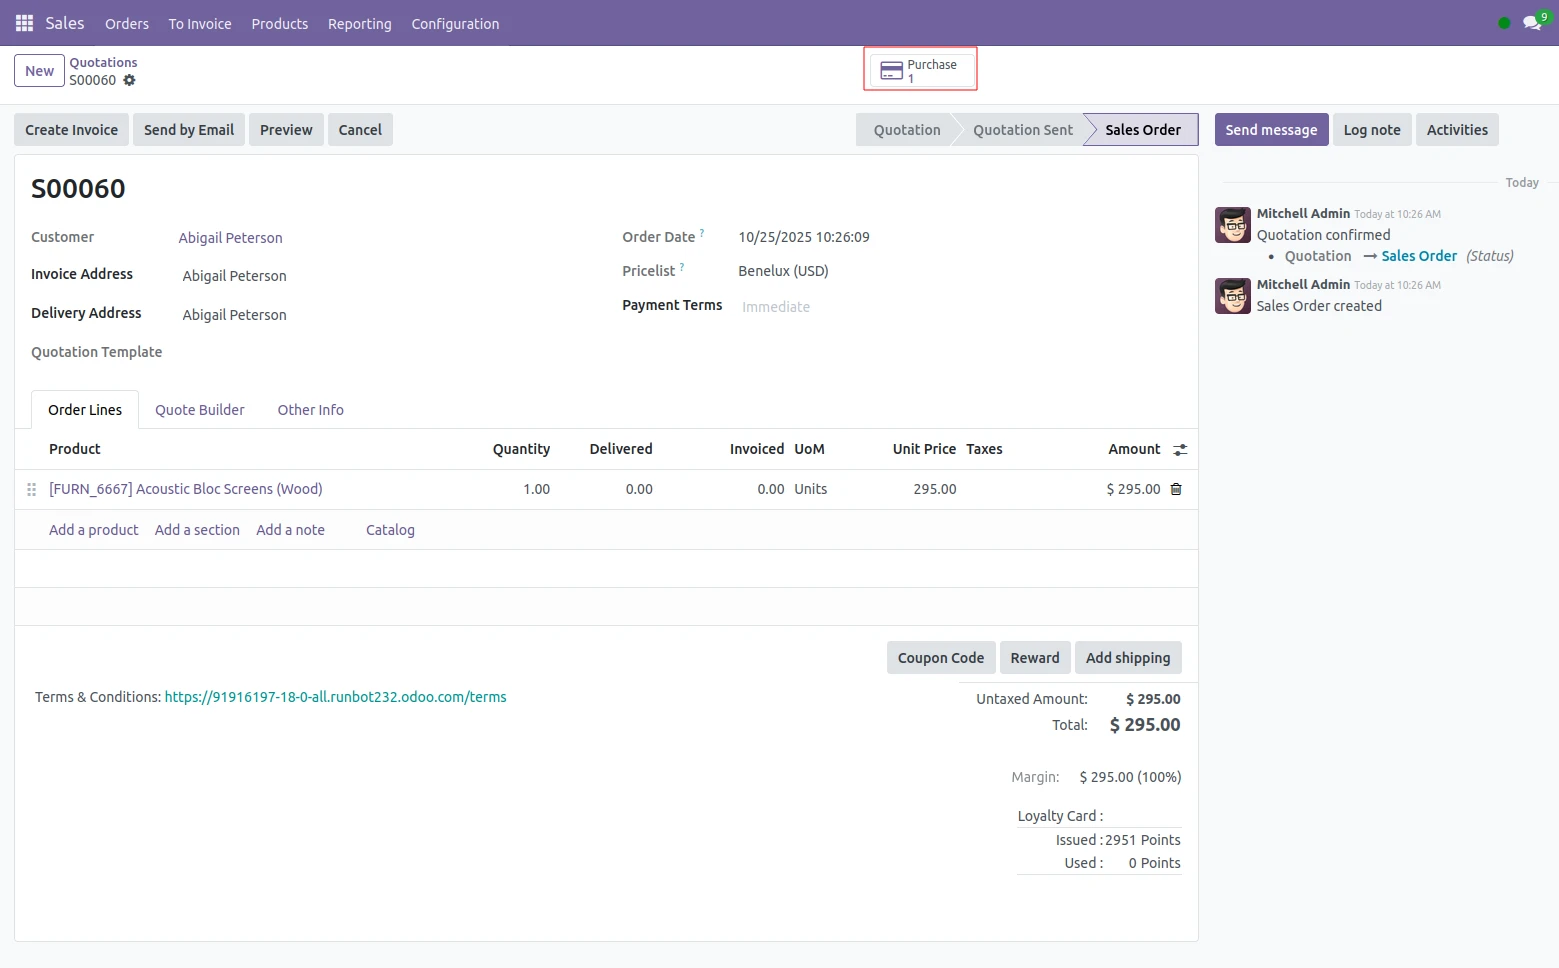
2. While viewing the sales order form, use the “Purchase” smart button to open the already generated purchase order created for this sale.
This corresponds with the purchasing process generated by your sales demand.
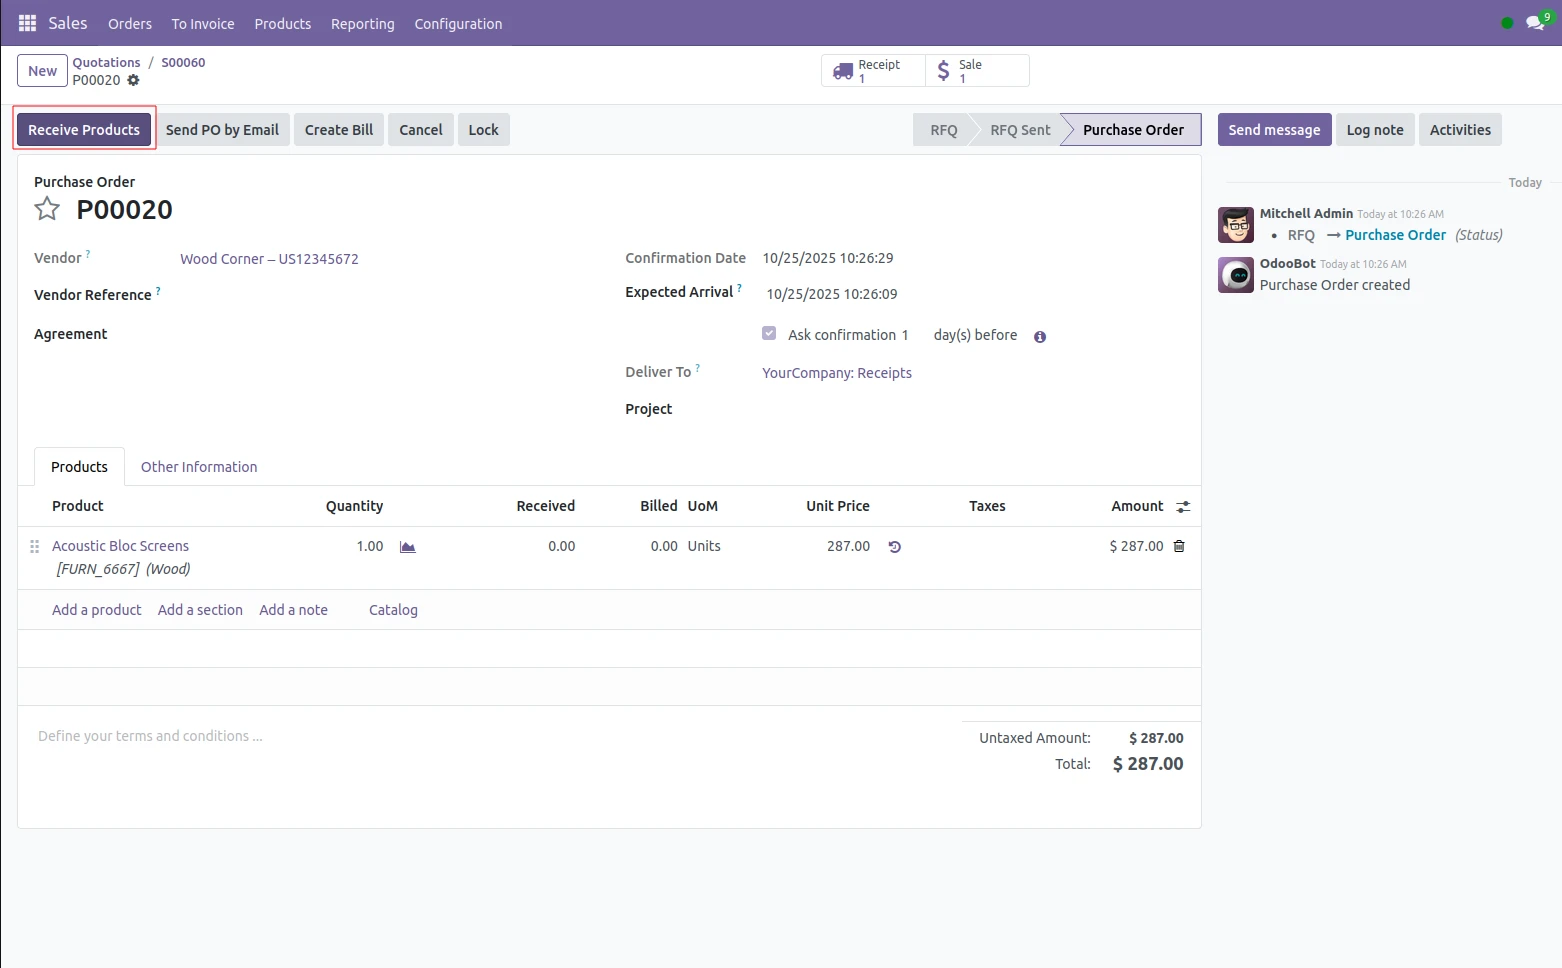
3. In the Purchase module, review the purchase order and confirm it. At that point you have committed the vendor and created a receipt for processing.

4. Click “Receive Products” on the purchase order to identify the incoming shipment (receipt) generated.
This is the process by which the vendor is transferring and delivering the goods to your Input location.
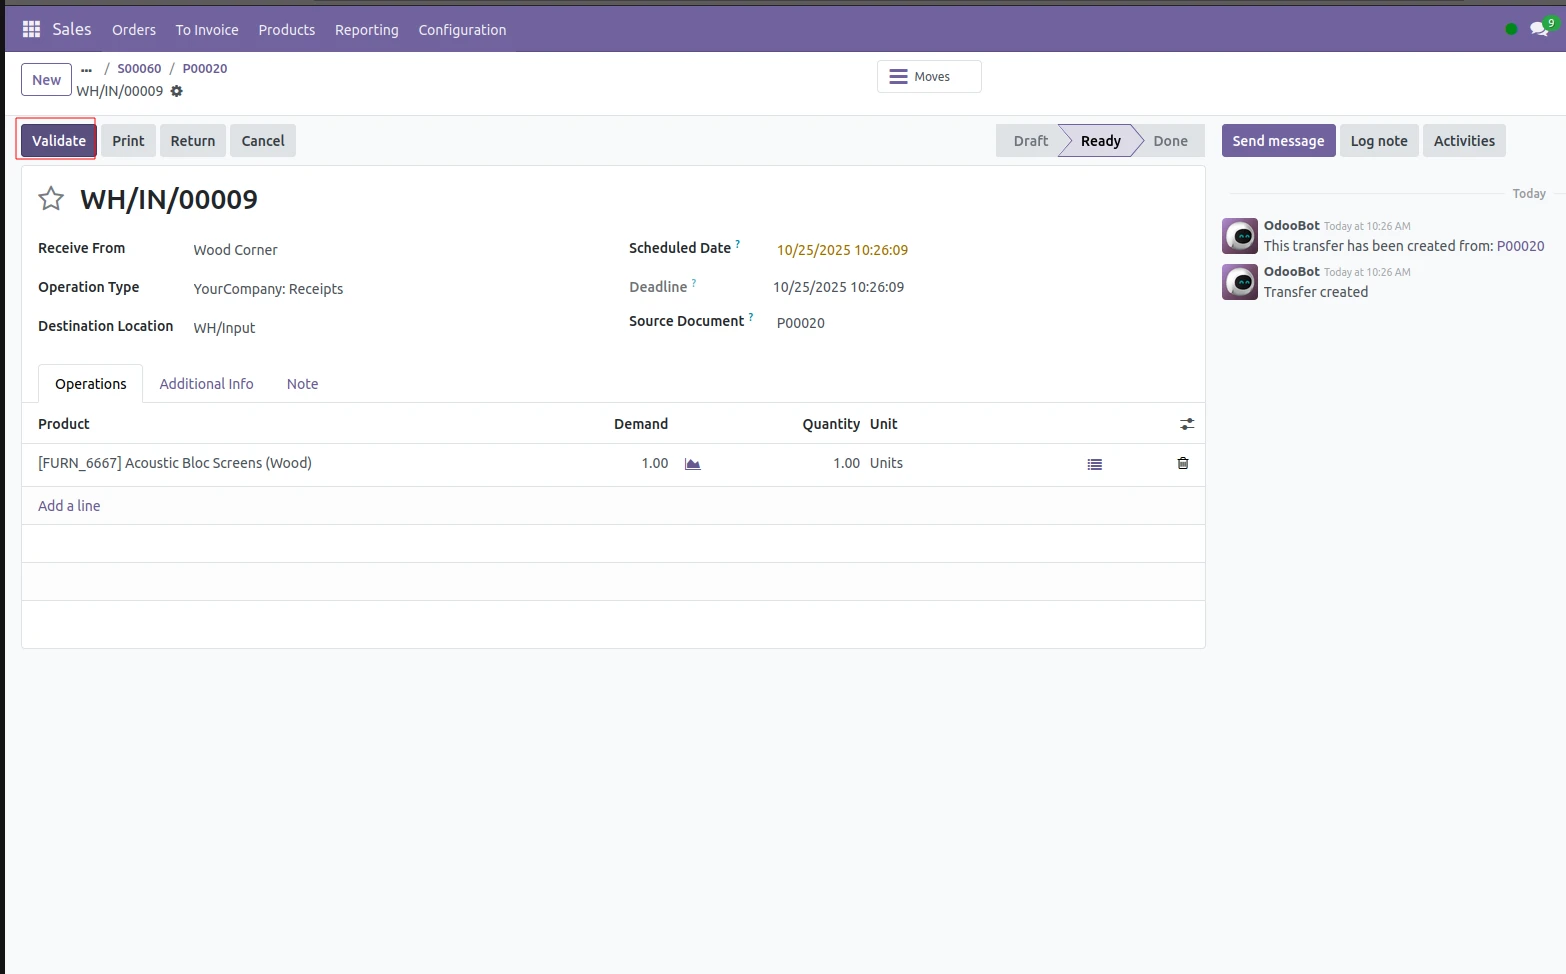
5. Ensure that receipt quantities match the order details; click “Validate” to complete the transaction.
Validation is the process of officially counting the products and moving it to the Input location in the warehouse where it completes the first step of the Cross-Dock process.
6. After validating the receipt, click the “Next Transfer” smart button Odoo has created for you after validation.
You will open the internal transfer containing the products moving
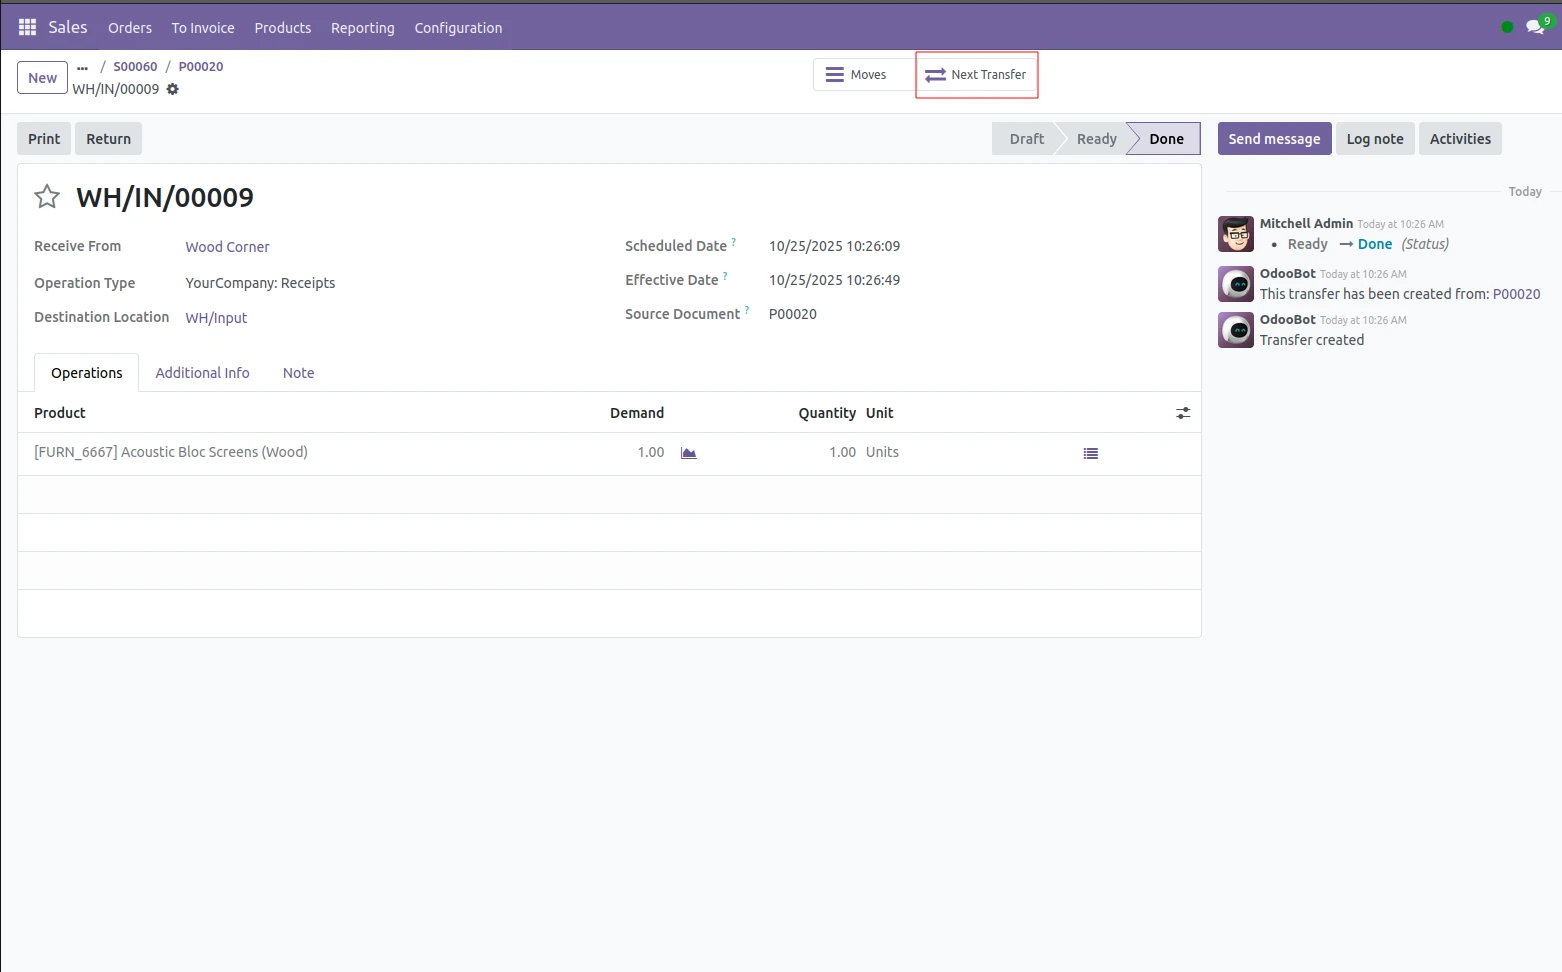
7. Open the internal transfer, and "Validate" in order to indicate that the material is physically moving from Input to Output. This confirms that the materials have moved through the cross-dock zone and are now ready to be sent to the client.
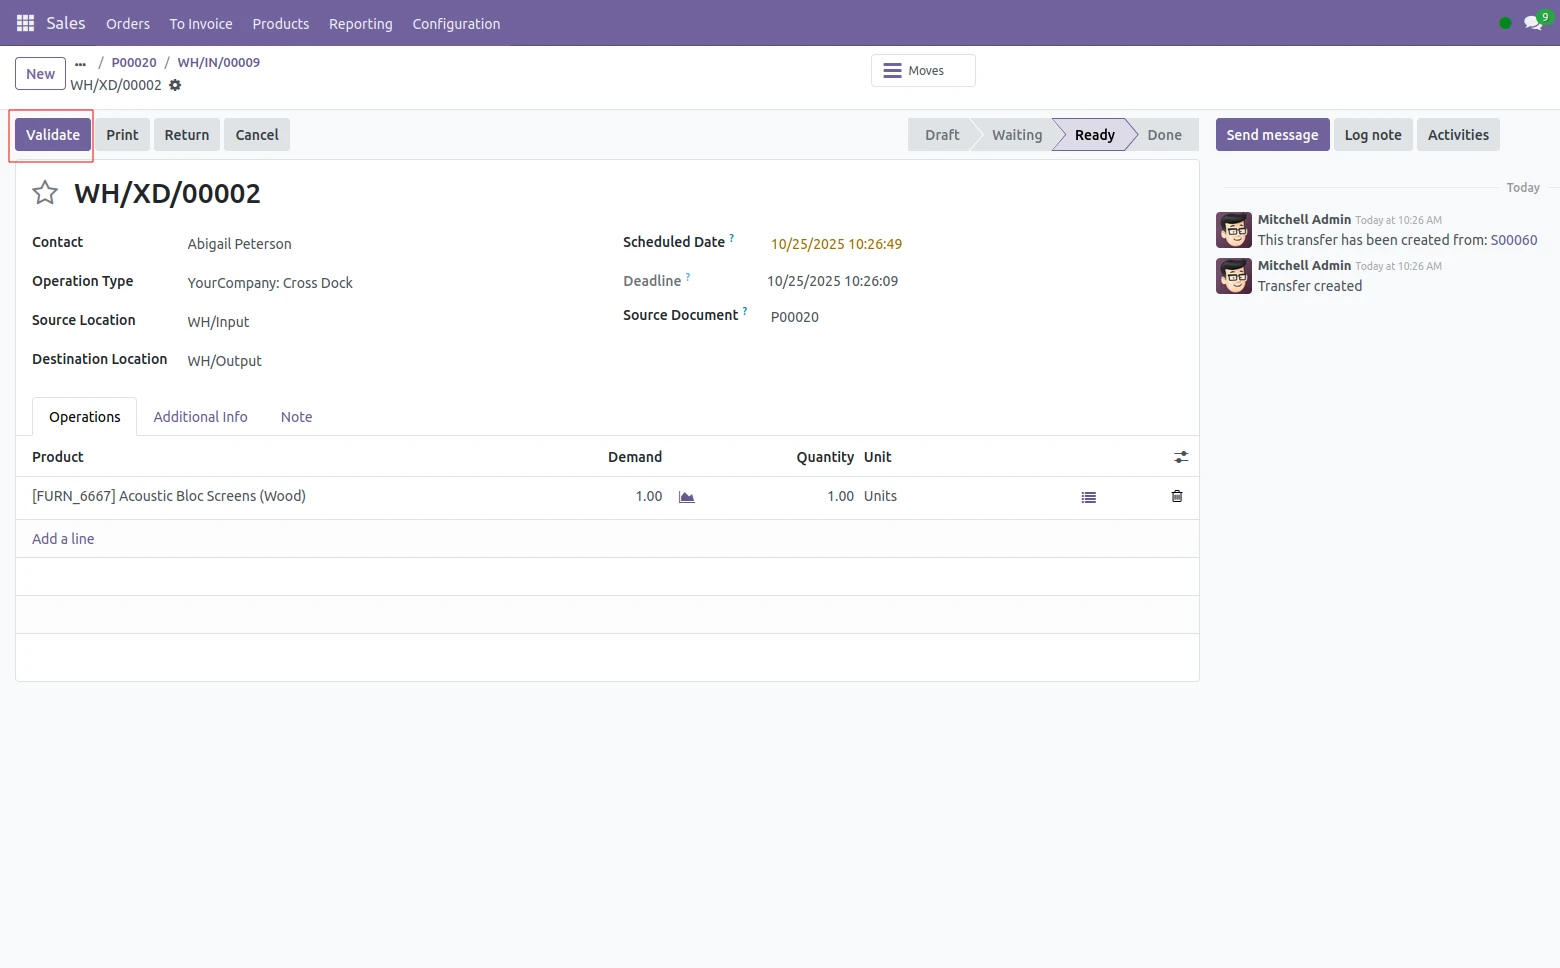
8. There is now a new "Next Transfer" smart button available once the internal relocation is done. This button will take you to the Delivery Order. Validate the Delivery Order to indicate that the shipment is exiting Output location to Customer (Virtual Location).

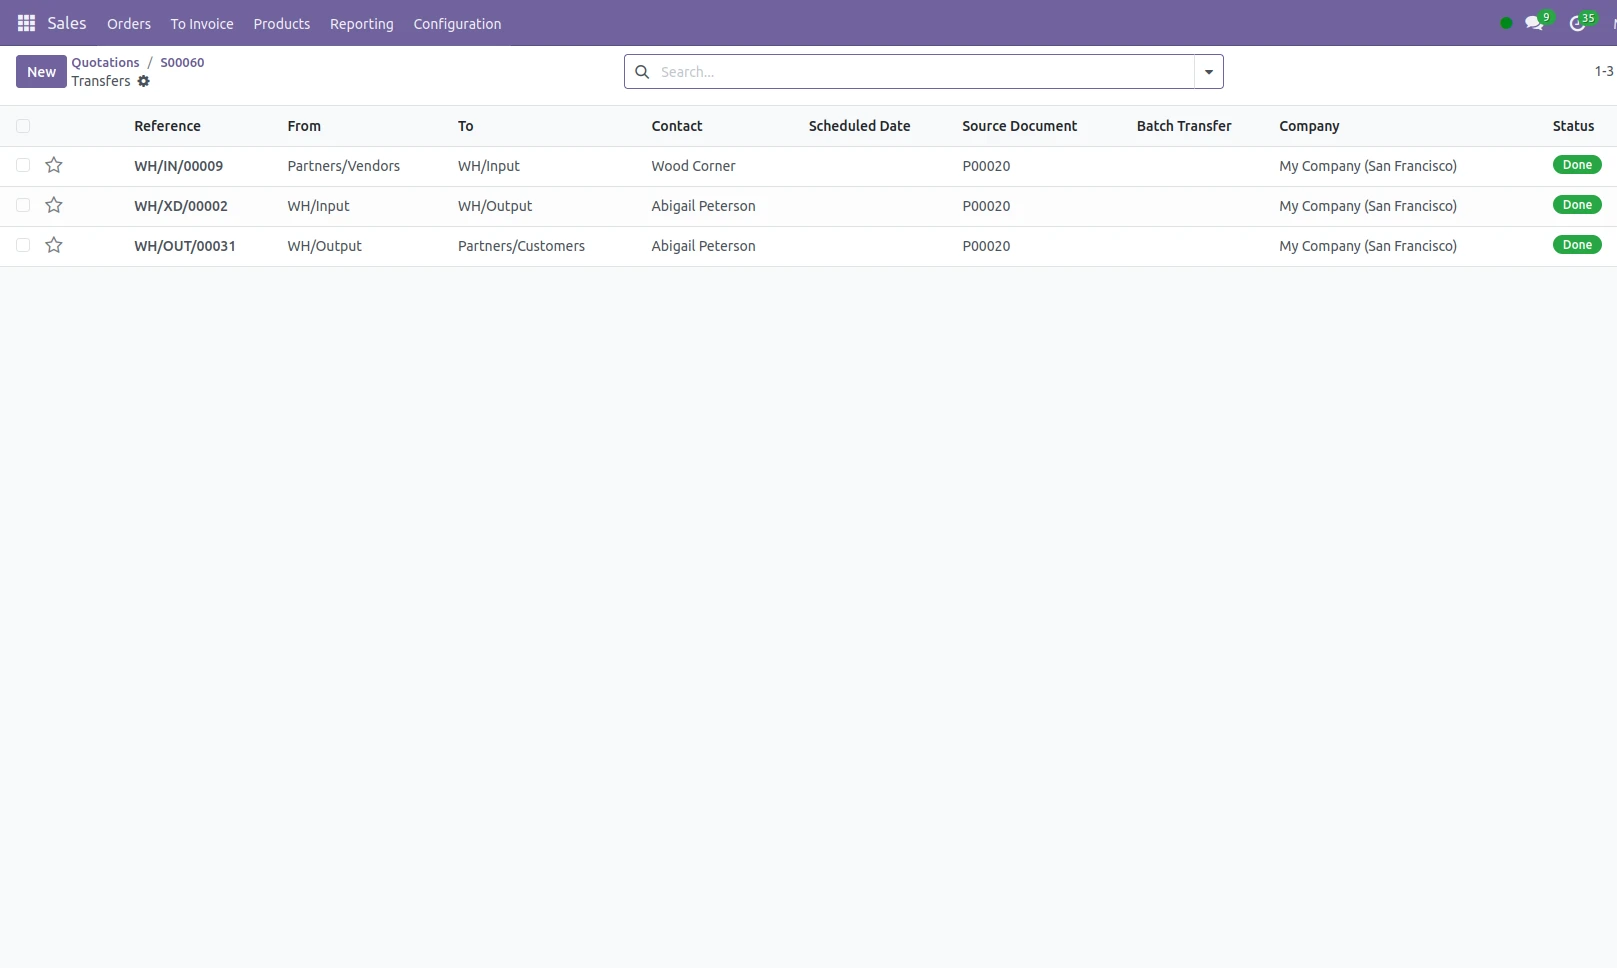
9. Once the process is done, you can even return to the Sales Order, and see all of the transfers that you made from the buttons "Delivery" and "Purchase." You'll be able to see the complete chain of transfers as: - Vendor → Input Location (Purchase Receipt) - Input → Output (Internal Cross-Dock Transfer) - Output → Customer (Delivery Order) Each of these stages represent a seamless, and tangible flow through their warehouse where coordination was managed automatically by Odoo's routing engine.
Odoo 18 Cross Dock is a powerful logistics feature designed to streamline warehouse operations by enabling faster movement of goods from inbound to outbound locations with minimal storage time. With Cross Docking in Odoo 18, businesses can reduce inventory holding costs, speed up order fulfillment, and improve overall supply chain efficiency. This functionality is especially beneficial for distributors, retailers, and fast-moving industries that rely on real-time stock movement and accurate delivery timelines. Odoo 18 enhances cross dock workflows with better automation, real-time visibility, and seamless integration with inventory, sales, and purchase modules—helping organizations achieve leaner and more responsive logistics operations.
Looking to optimize your warehouse operations with Odoo 18 Cross Docking with Odoo ERP Software? Get in touch with our Odoo experts today to implement, customize, and scale a cross dock solution that accelerates deliveries and reduces logistics costs.


.jpg )


Leave a comment