

What if your warehouse could run faster without working harder?
In Odoo 18, Batch and Wave Transfers turn scattered picking and shipping into a smooth, organized flow cutting down movement, saving time, and bringing clarity to even the busiest operations. No more back-and-forth, no more guesswork just smarter execution.
If you’re looking to handle more orders with less effort and better control, this is where it starts.
Batch Transfer
How would you feel if you didn’t have to continually walk down the same rows of merchandise or stock to fill each individual order your company receives? With the Odoo 18 Batch Transfers feature, you can easily streamline your warehouse operations by processing multiple transfer orders at once.
Instead of processing individual picking orders separately from one another, similar picking operations are grouped together and picked in one batch. This allows your warehouse staff to navigate through your entire warehouse only once and accomplish numerous picking and transferring tasks on the same visit. Not only are there fewer total transfers performed, but the time required to fulfill each order is reduced, the accuracy of fulfilling orders will be improved, and your staff’s productivity will increase. Regardless of whether your company has a large volume of sales orders or internal transfers, using batch processing in your warehouse will provide better structure and flow to your daily operations. Although it may seem like a minor change in how to approach order fulfillment in your warehouse, the effects of batch transfers can be seen immediately less walking, decreased time wastage & under-production, and an overall increased efficiency in warehouse operations. If you want to fulfill more orders while expending less energy, then you should consider batch transfers as an option to help achieve your goals.
Let's see how to handle batch transfer in Odoo
To use Batch Transfer go to Inventory App and from there Configuration => Settings. There under Operations Section enable Batch Wave and Cluster Transfers.
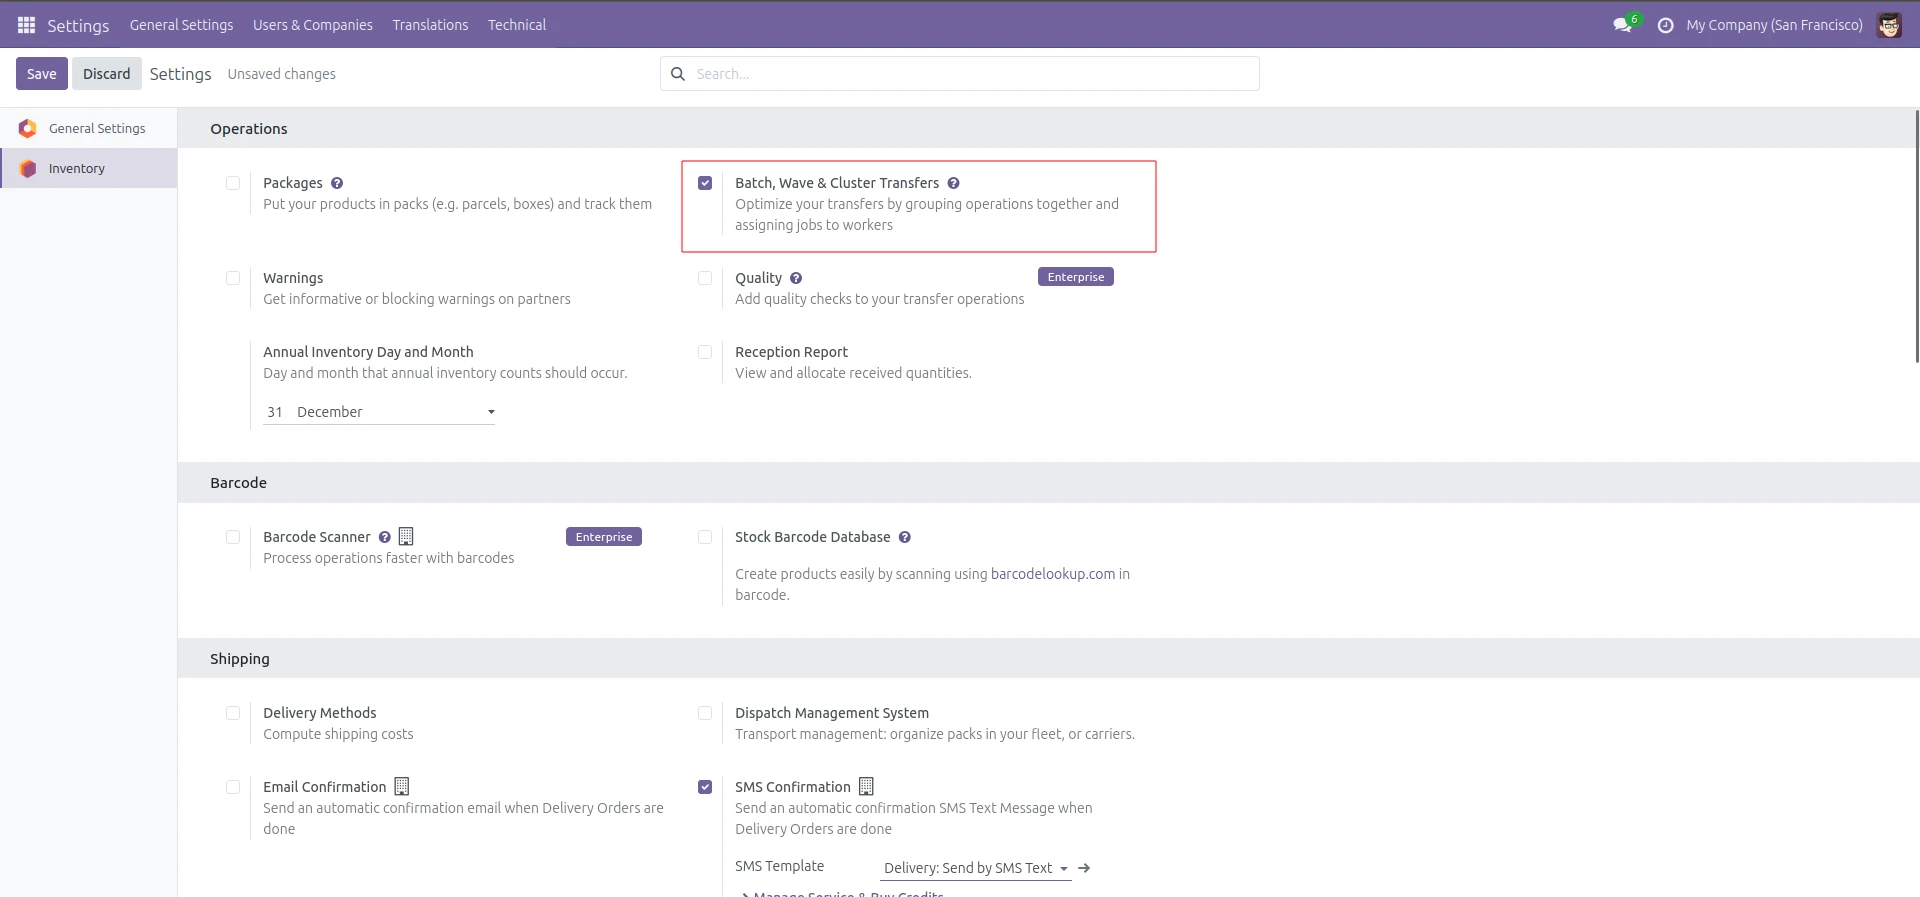
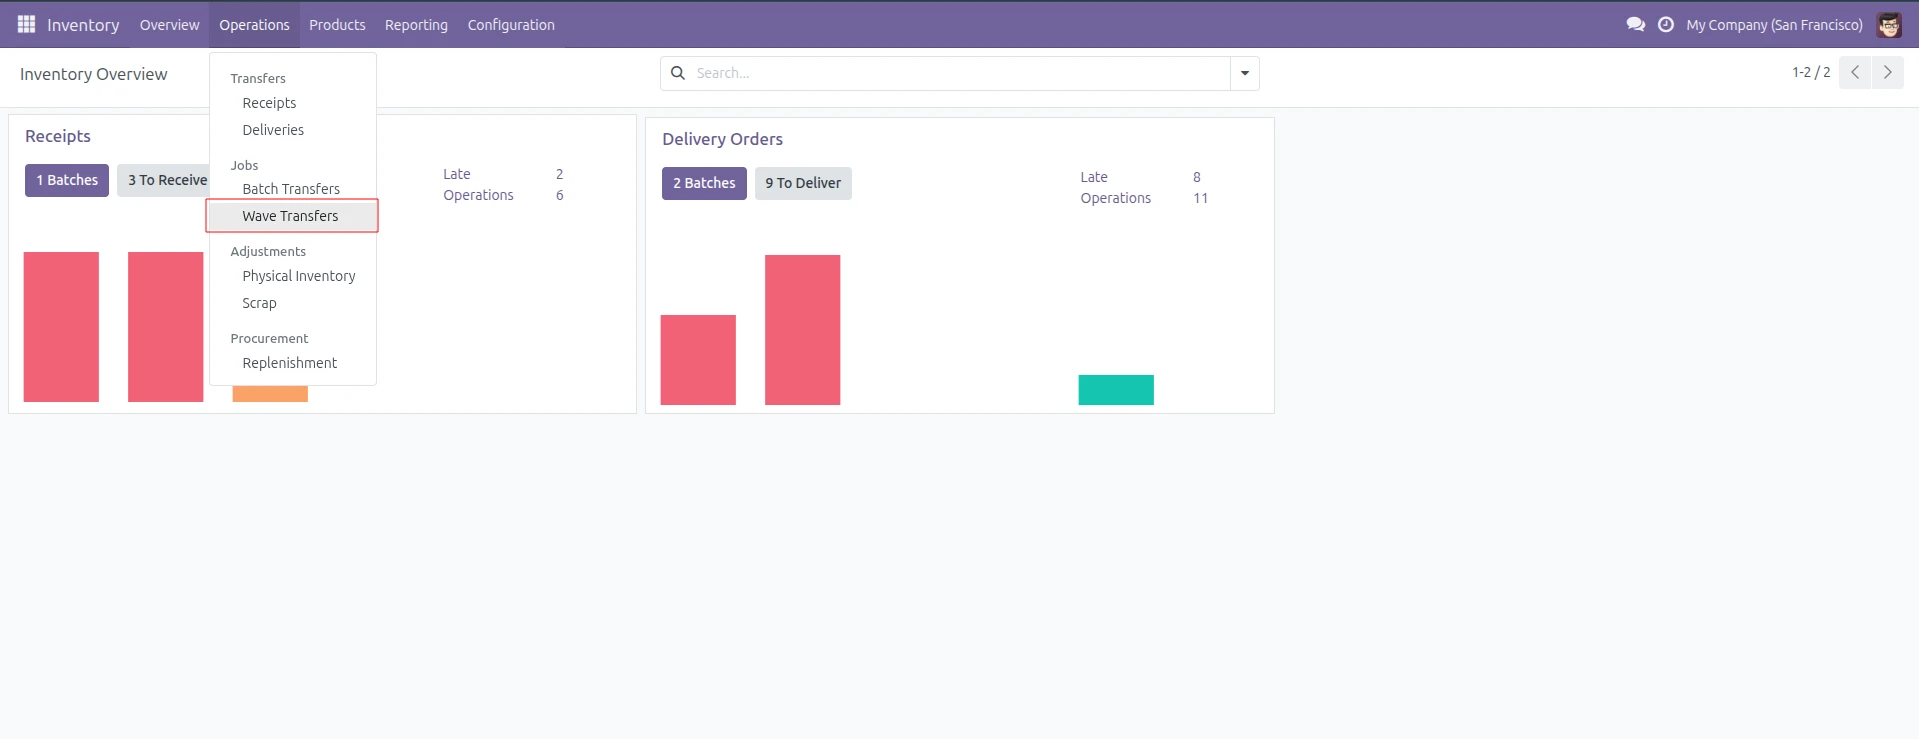
When enabling this two new Menus appear in Operations: Batch Transfers and Wave Transfers
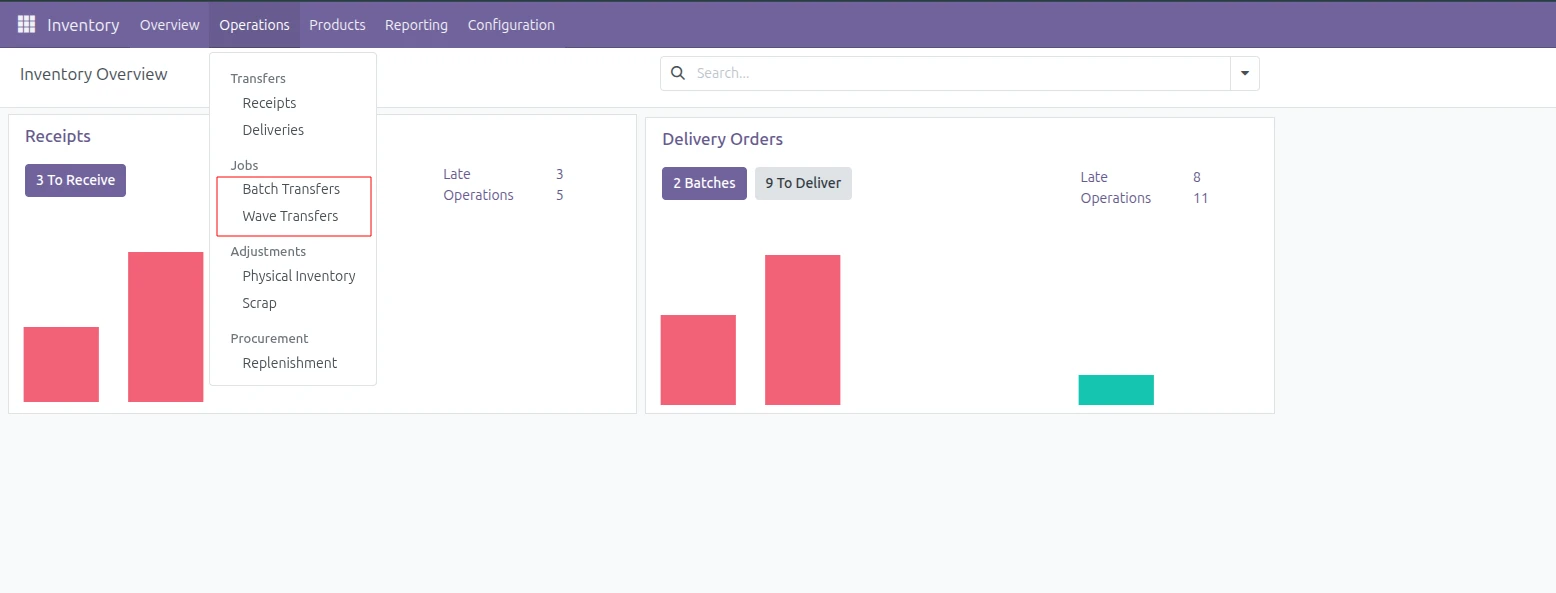
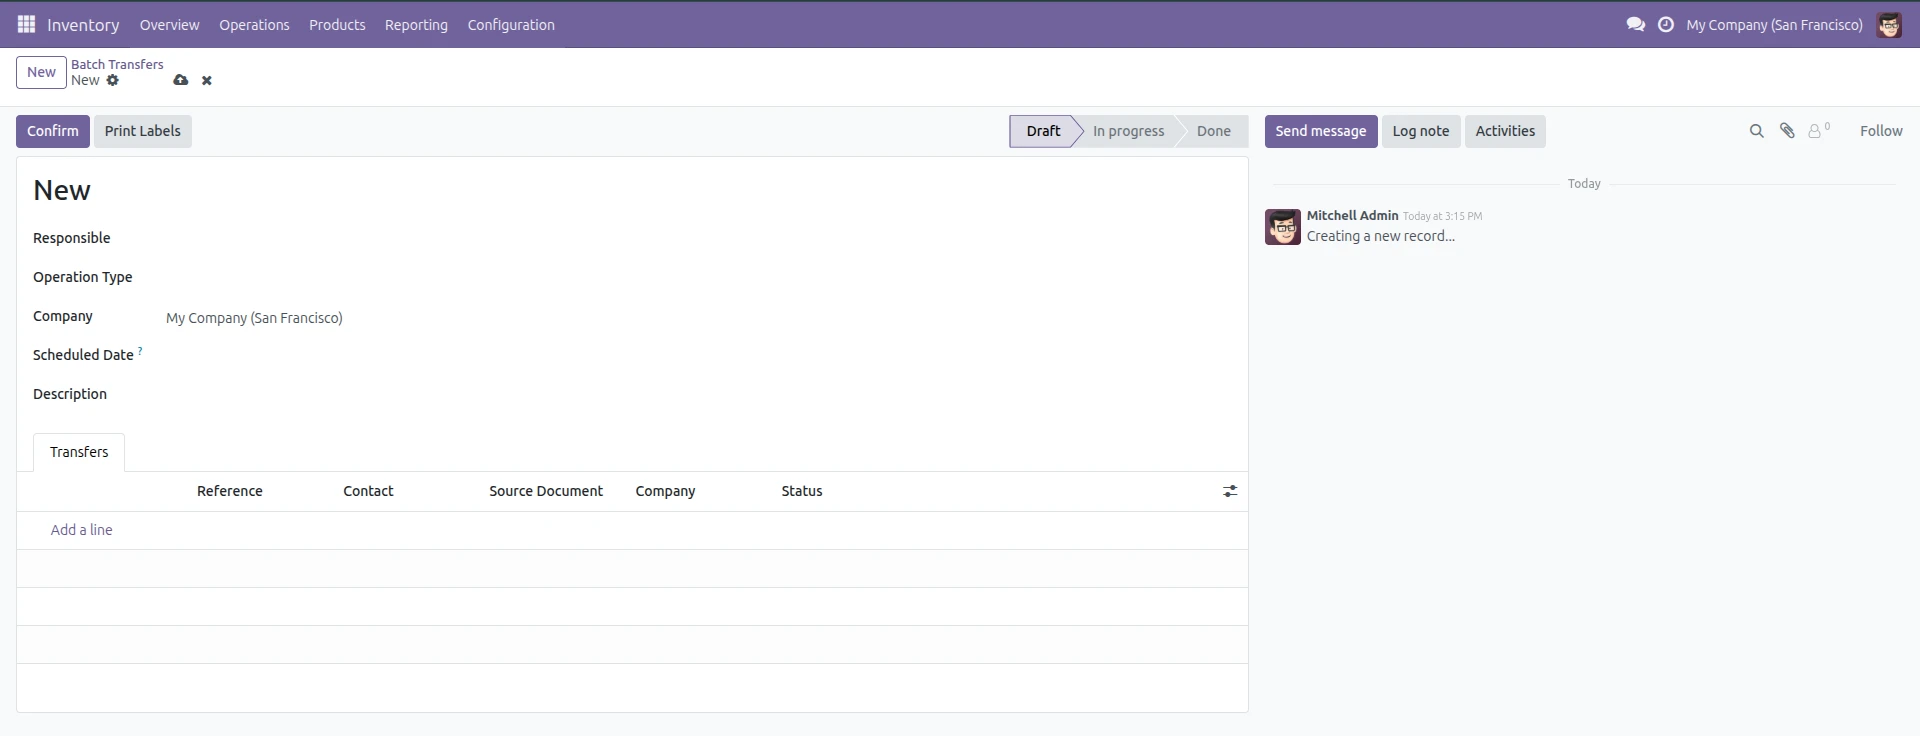
To create a Batch Transfer go to the Batch Transfer section there you will be directed to a page where already created Batch Transfers will be seen. Click New and create a new Batch Transfer.
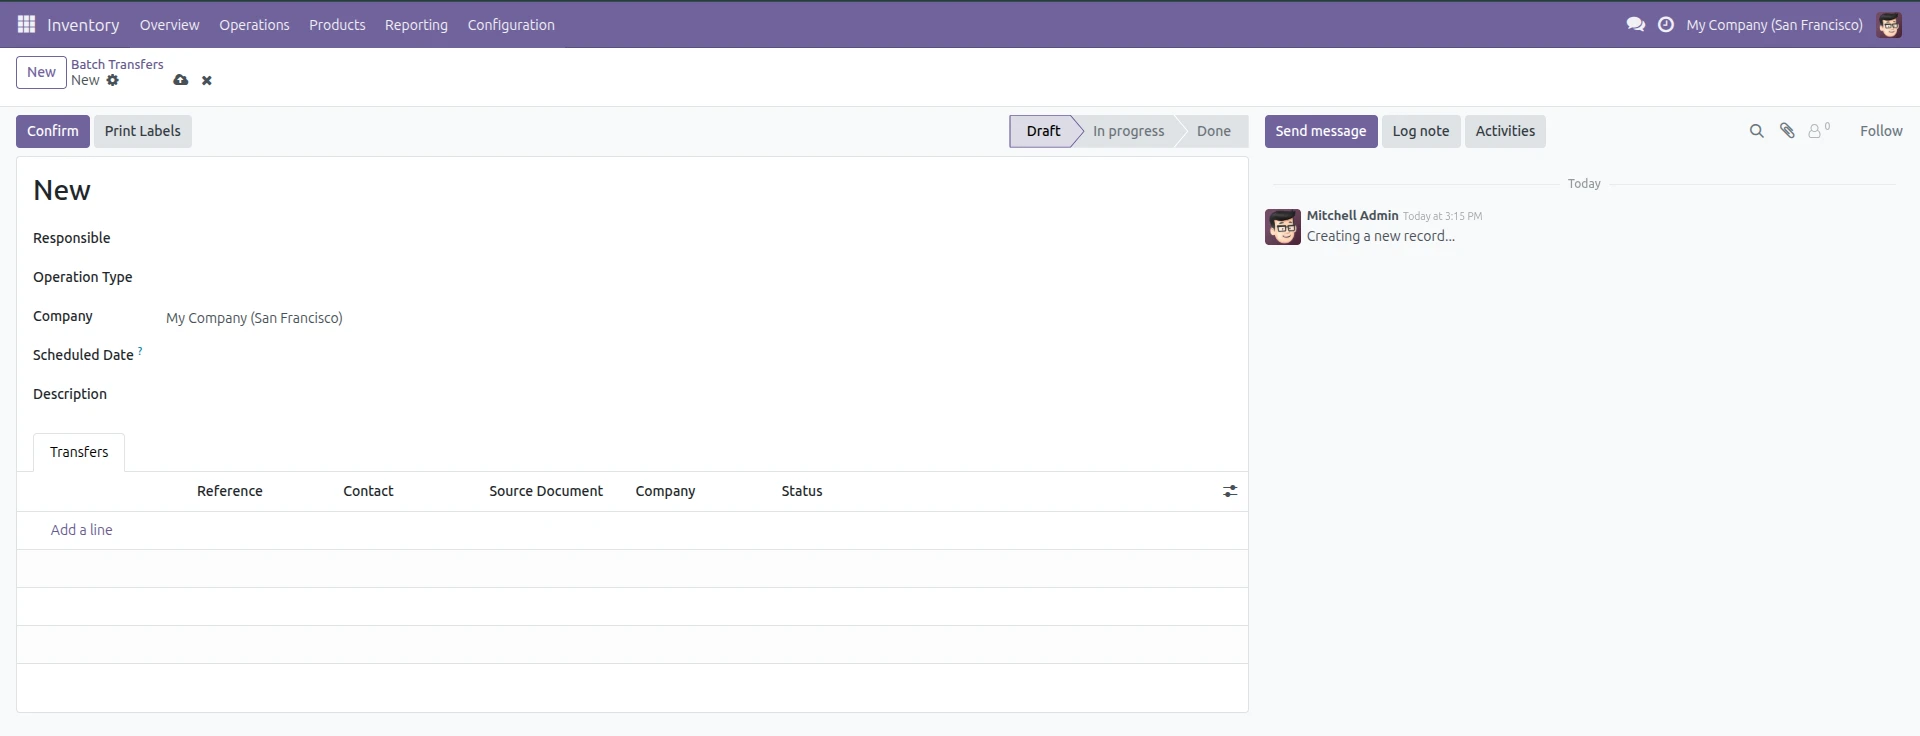
To create a proper Batch Transfer, provide the
-
Responsible
-
Operation Type
-
Schedule Date
From the Transfers tab, the transfers needed can be selected.
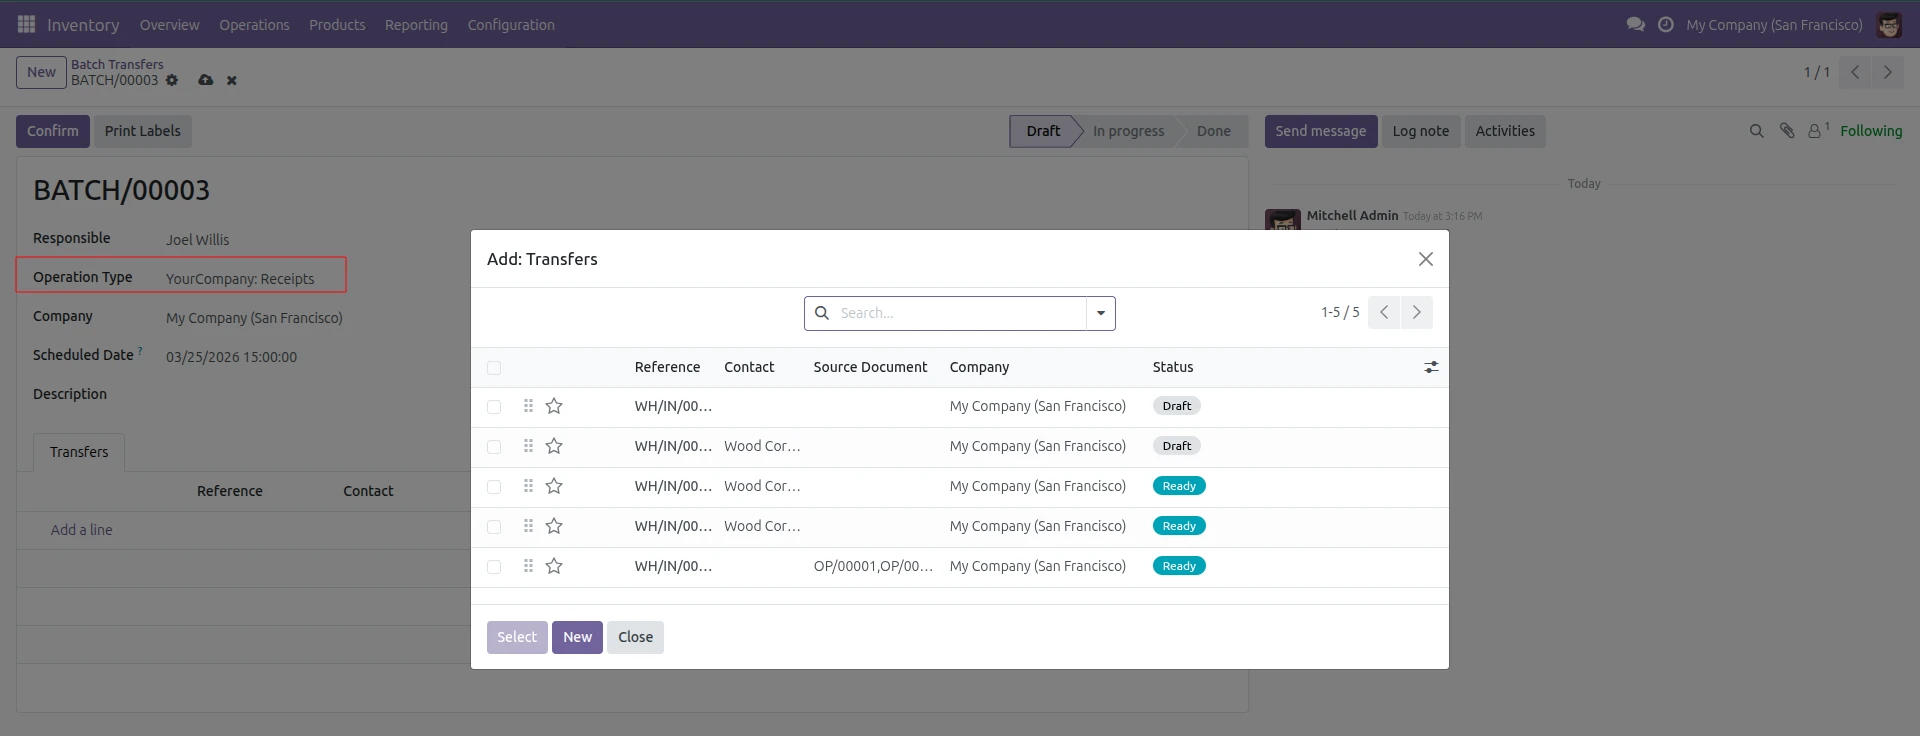
In this wizard, all transfers of type Receipts are displayed, since the operation type has been set to Receipts.
Select the required transfers using the checkboxes, then click the Select button to confirm.
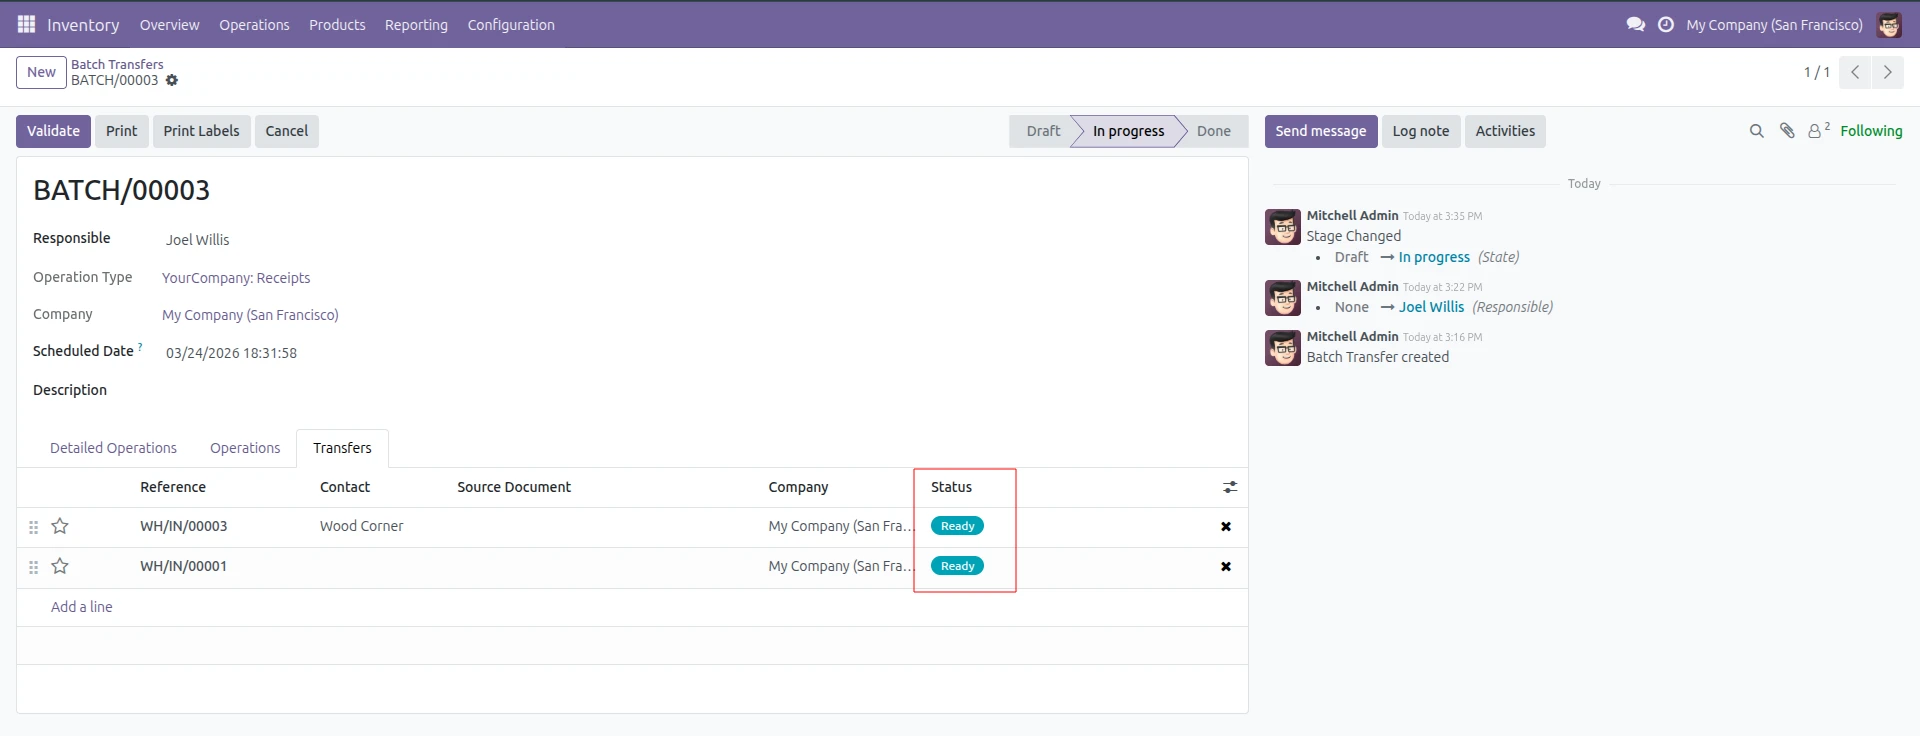
Here two transfers, one in Draft State and one in Ready State, are selected. Click the Confirm button to confirm the Batch Transfer.
After Validating the Receipts change into Done state.
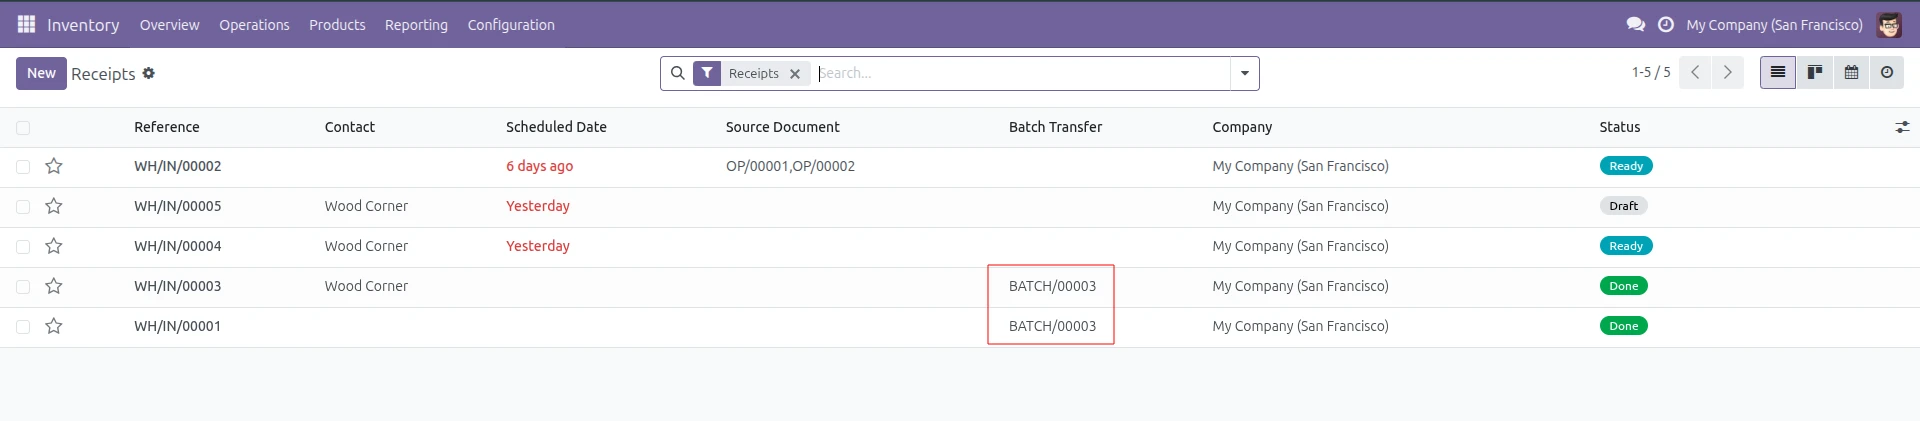
In the Receipts view, you can easily identify the linked Batch Transfer name.
You can also create a batch transfer directly from the list view simply select the required receipts and choose Add to Batch from the Action menu.
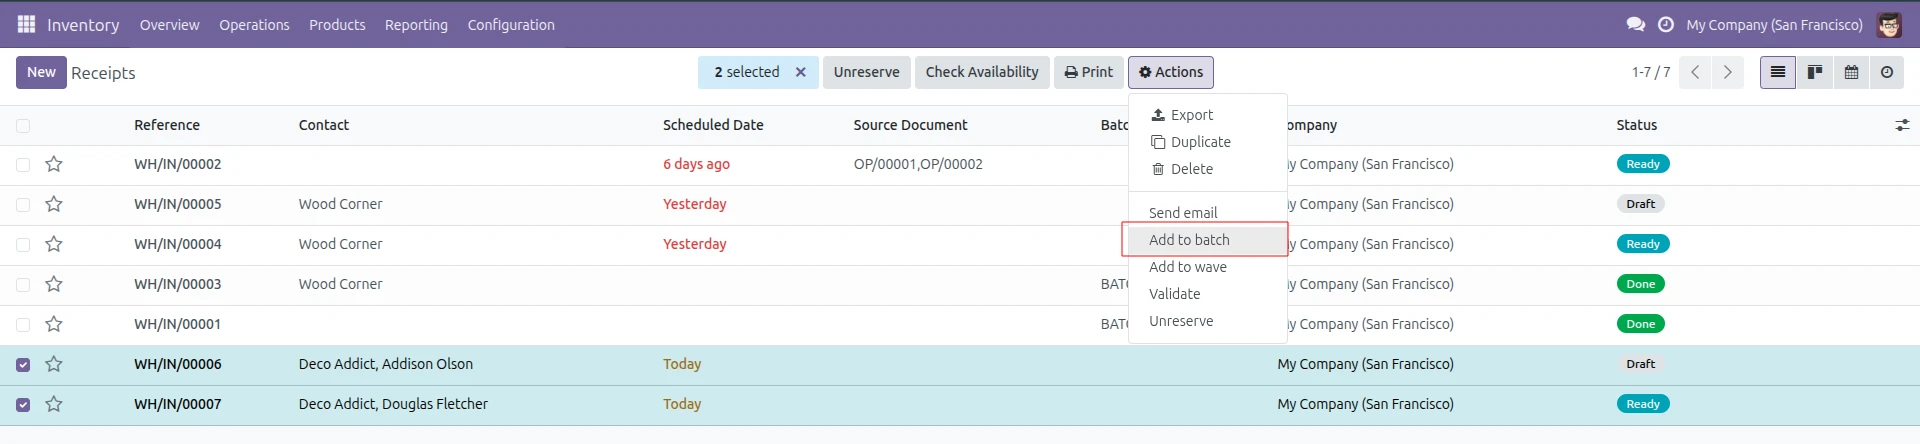
A pop-up window will appear, allowing you to either add the selected transfers to an existing batch or create a new one. Choose Add a New Batch, assign a responsible person, and enable the Draft option if you want to create the batch in draft status.
Wave Transfer
Wave Transfers Wave Transfers lets you group your operations into transfer clusters. These clusters can then be utilized as planned waves, whether for operational requirements, delivery schedules, or routes. This flexibility means that your order processing, from initiation to completion, isn't rigidly defined by these choices at any given moment.
This will create better timing, better efficiency, and help your warehouse stay on track with itself and other distribution centers. Wave Transfers gives you greater control over your operations and enables better planning for the future.
Let's see how to handle wave transfer in Odoo
Just like before enable Batch Wave and Cluster Transfers in Inventory => Configuration => Settings.
To create a Wave Transfer go to the Wave Transfer section there you will be directed to a page where already created Wave Transfers will be seen. Click New and create a new Wave Transfer.
Click the Prepare Wave button to create a new Wave Transfer. This opens a wizard where you can select the transfers to include.
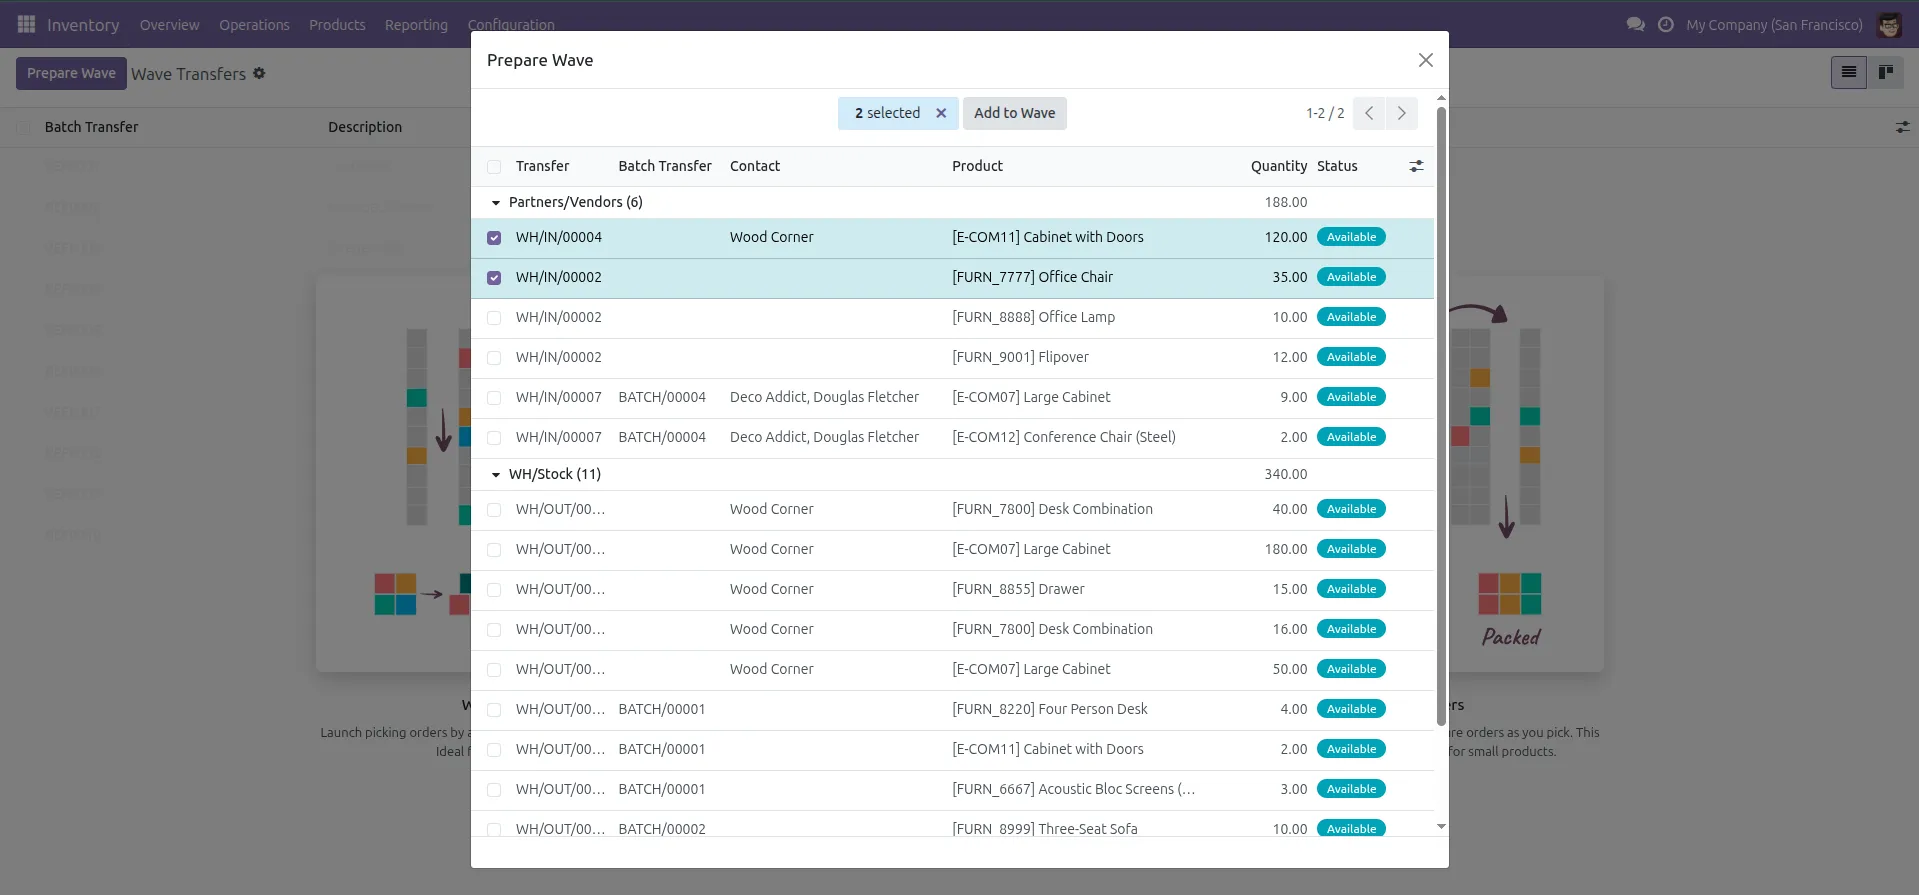
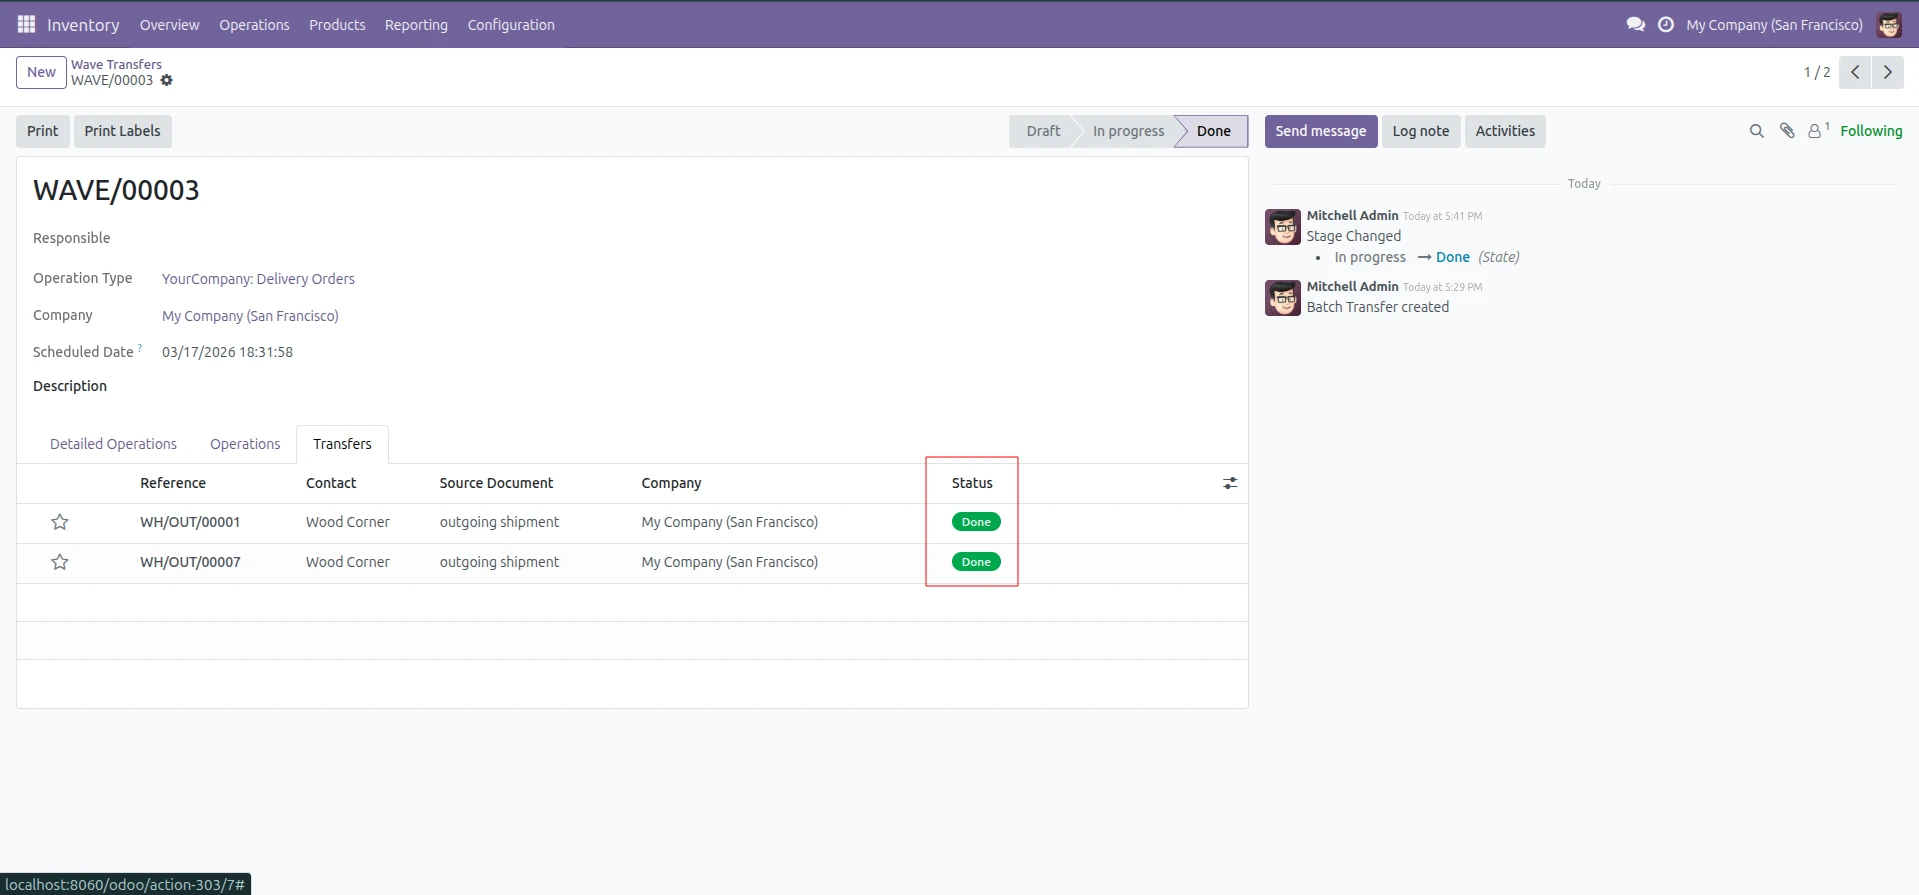
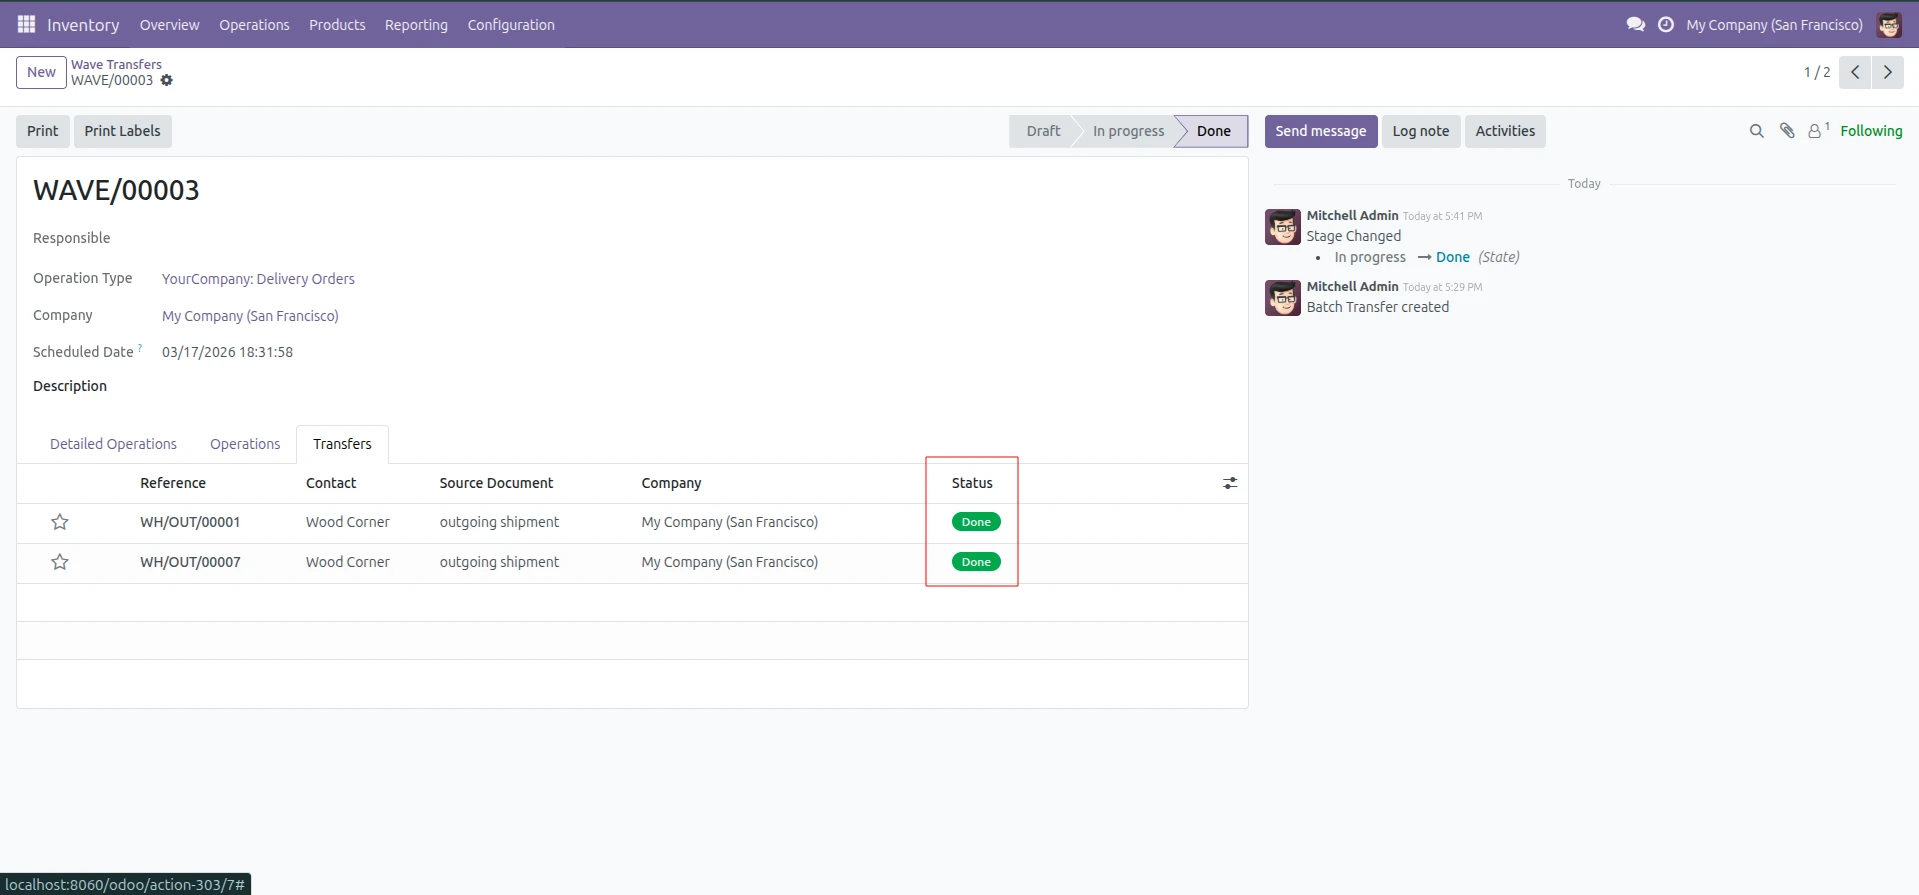
Select the Transfers and click Add to Wave. The Wave Transfers will start in the In Progress state and when clicking Validate, wave and its associated transfers move to the Done state
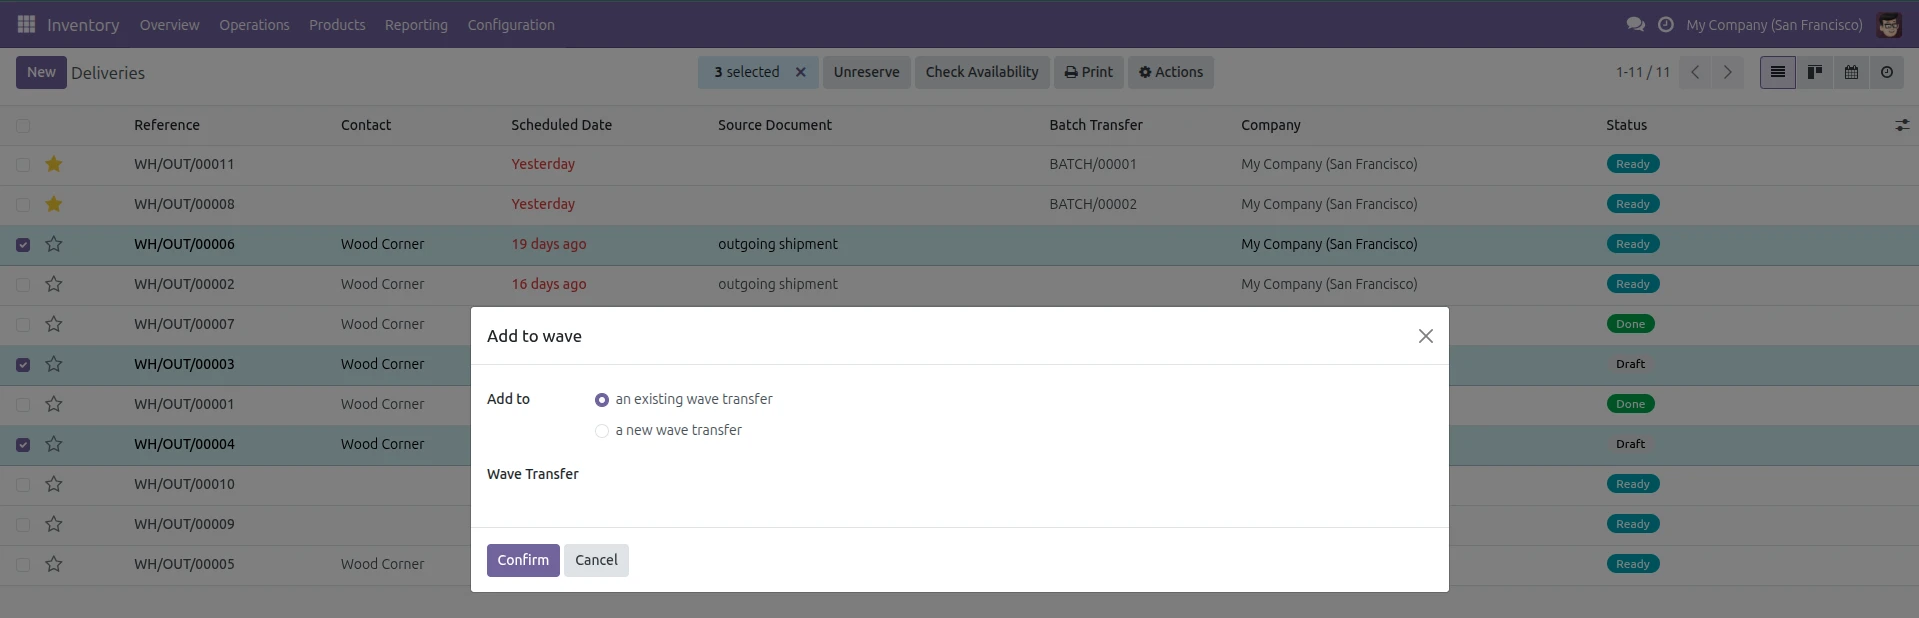
You can also create a wave transfer directly from the list view, select the required deliveries and choose Add to Batch from the Action menu.
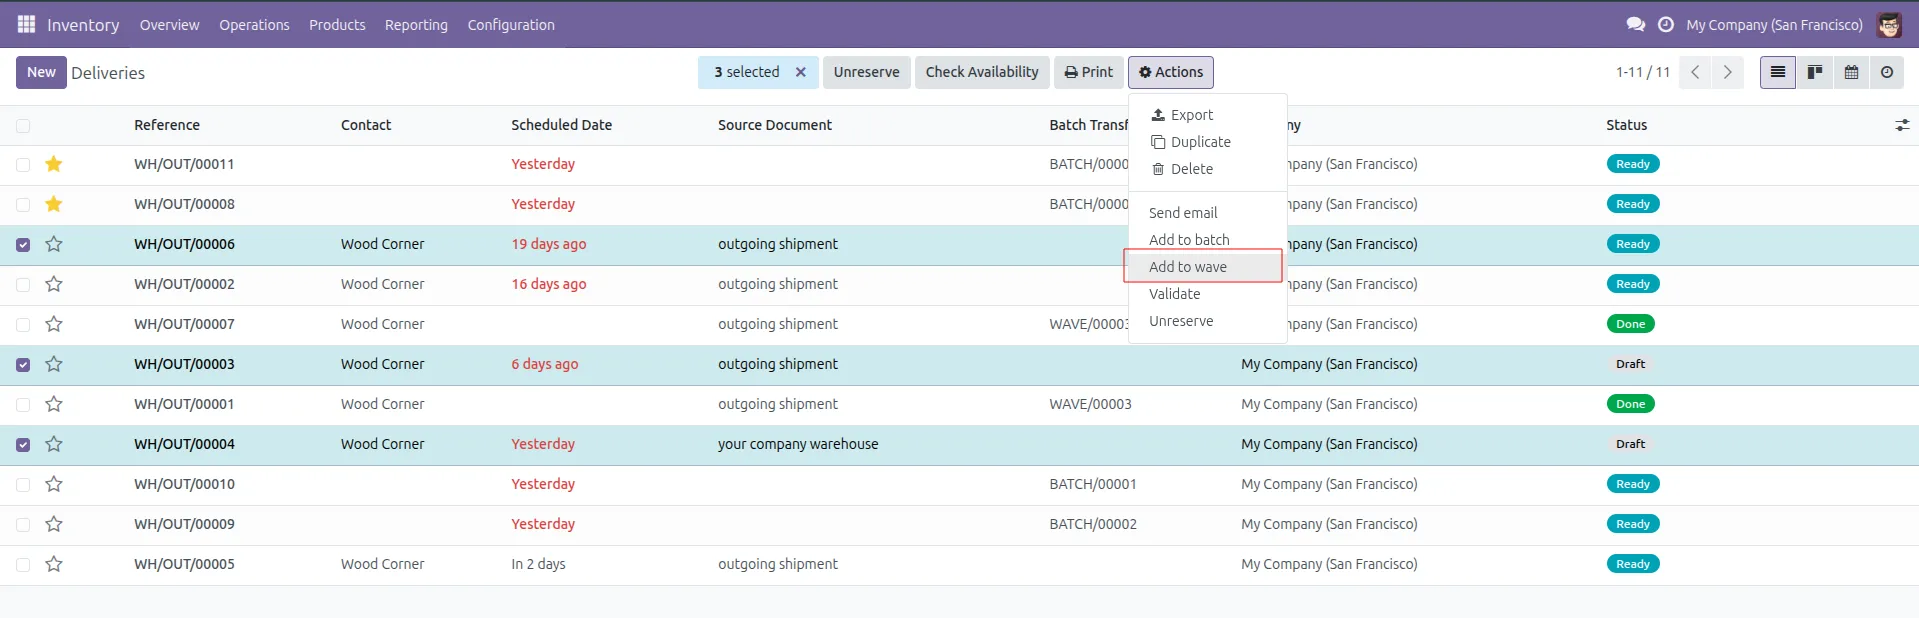
A wizard pops up that allows you to either create a new wave transfer or include the selected in an existing transfer



.jpg )


Leave a comment